![]()
Applying cluster lashes can be a game-changer for your beauty routine, offering the voluminous, fluttery look of extensions without commitment.
This guide will walk you through the process, making it easy to achieve stunning results at home. Whether you’re a beginner or looking to refine your technique, you’ll find all the tips you need here. Let’s dive into how to put on cluster lashes effectively.
What Are Cluster Lashes?
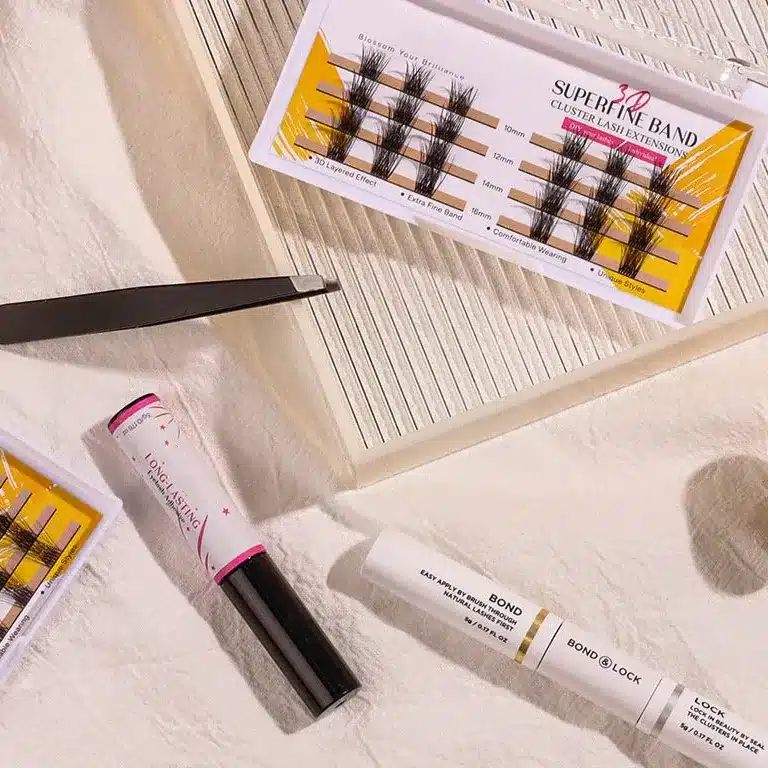
Before we get into the application process, it’s essential to understand what cluster lashes are. Cluster lashes, also known as flare lashes, are small groups of false lashes attached to a tiny base. They offer a middle ground between strip lashes and individual lash extensions, providing a fuller look while being easier and faster to apply than individual lashes.
Why Choose Cluster Lashes?
Cluster lashes offer several benefits:
Ease of Application: They are quicker to apply compared to individual lashes.
Customization: You can control the volume and placement, creating a personalized look.
Comfort: When applied correctly, they feel light and natural.
Versatility: Suitable for both everyday wear and special occasions.
Tools and Products You’ll Need
To get started, gather the following tools and products:
- Cluster Lashes: Choose a style that suits your desired look.
- Bond and Seal: This adhesive system is crucial for a long-lasting hold.
- Tweezers: For precise application.
- Lash Applicator: Optional, but can be helpful.
- Lash Curler: To blend natural lashes with clusters.
- Mascara: For a finishing touch.
Preparing Your Natural Lashes
Preparation is key to ensuring your cluster lashes look flawless and stay in place.
- Clean Your Lashes: Make sure your natural lashes are clean and free of oil or makeup. Use a gentle cleanser to remove any residue.
- Curl Your Lashes: Lightly curl your natural lashes with an eyelash curler. This helps them blend seamlessly with the cluster lashes.
- Apply a Thin Layer of Mascara: This provides a base that helps the cluster lashes adhere better.
How to Put on Cluster Lashes for Beginners
If you’re new to cluster lashes, start with a simple, how to put on cluster lashes step by step:
Step 1: Select Your Lashes: Choose cluster lashes that match your natural lash line. Beginners might find it easier to start with shorter clusters before moving to longer ones.
Step 2: Apply the Bond: Using a precision applicator, apply a thin layer of bond to your natural lashes. Focus on the base of your lashes, where the clusters will be attached.
Step 3: Pick Up a Cluster: Use tweezers to pick up a cluster lash by the base. Be gentle to avoid deforming the cluster.
Step 4: Dip in Bond (if required): Some clusters might need a touch of bond on their base. Dip the base lightly into the bond.
Step 5: Position the Cluster: Place the cluster lash on your natural lashes, as close to the lash line as possible. Press gently to secure it in place.
Step 6: Repeat and Fill In: Continue applying clusters along your lash line. Start from the outer corner and work your way inwards. Adjust the spacing based on your desired look.
Step 7: Seal the Lashes: Once all clusters are in place, apply the seal. This step is crucial for securing the lashes and ensuring they last.
How to Put on Cluster Lashes with Bond and Seal
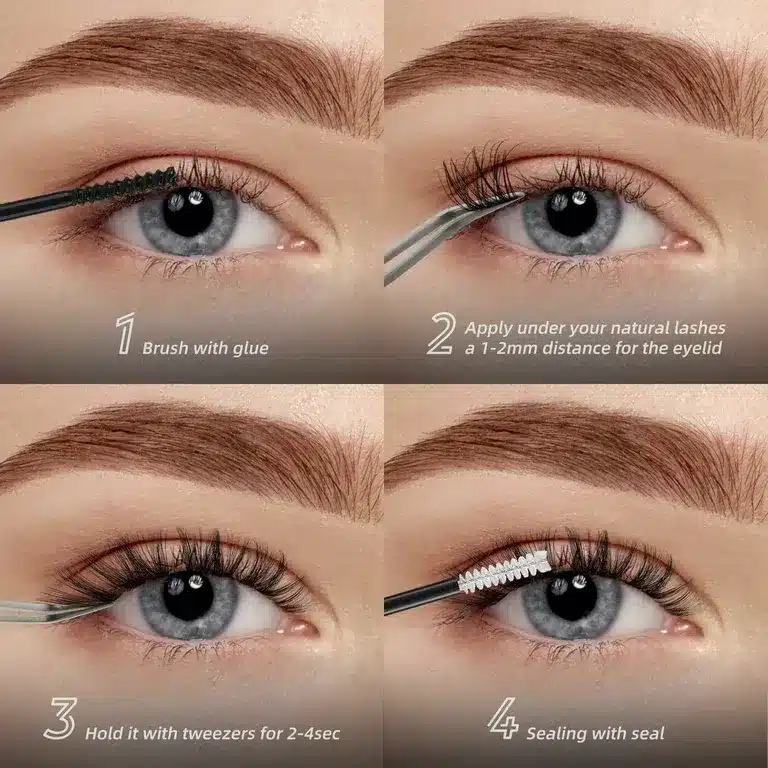
For a more secure and professional finish, follow these steps using a bond and seal system:
Prepare the Bond and Seal: Ensure you have both products ready. The bond is the adhesive, and the seal acts as a top coat to lock everything in place.
Apply the Bond: Apply a thin layer of bond to your natural lashes. It’s important to use just enough to cover the lash base without clumping.
Attach the Cluster: Using tweezers, pick up a cluster and dip the base into the bond. Place it on your natural lashes, close to the lash line. Hold for a few seconds to let it set.
Continue Applying Clusters: Repeat the process, placing clusters along your lash line. For a natural look, use shorter clusters on the inner corners and longer ones towards the outer corners.
Apply the Seal: Once all clusters are applied, brush the seal over the lash base. This step is crucial for making the lashes last longer and look more natural.
How to Remove Cluster Lashes
Removing cluster lashes properly is just as important as applying them. Follow these steps to ensure you don’t damage your natural lashes:
- Use a Lash Remover: Apply a lash remover specifically designed for false lashes. Avoid pulling or tugging at the clusters.
- Let the Remover Sit: Allow the Remover to sit for a few minutes to break down the adhesive.
- Gently Remove the Clusters: Use tweezers or your fingers to lift the clusters off your natural lashes gently.
- Cleanse Your Lashes: After removal, cleanse your natural lashes to remove any remaining adhesive.
Conclusion
Learning how to put on cluster lashes can elevate your beauty routine, offering a customizable and natural-looking enhancement.
Whether you’re a beginner figuring out the basics or looking to perfect your technique with bond and seal, these steps will help you achieve beautiful, long-lasting results.
Remember to be patient with yourself and practice regularly. With time and practice, you’ll master the art of applying cluster lashes, enjoying the confidence and glamour they bring.

