

You want your diy lashes to last as long as possible, right? Heyme Beauty diy lashes typically stay put for 3–10 days, depending on how you apply them, the adhesive you choose, and how much care you give them.
Most people find diy eyelash extensions last around 3 to 7 days, especially if they are new to diy lash application. If you have more experience, you might see your diy lashes looking fresh closer to the 10-day mark.
Good prep, smart technique, and your daily habits make a big difference in eyelash extension longevity. Heyme Beauty diy lashes give you a high-quality, customizable look you can trust at home.
Key Takeaways
- Expect your DIY eyelash extensions to last between 3 and 10 days. Proper application and care can help you reach the longer end of that range.
- Choose a strong adhesive and follow good application techniques. This ensures your lashes stay put and look great for longer.
- Daily maintenance is key. Use a clean spoolie to groom your lashes and avoid oil-based products to keep the adhesive strong.
- Practice makes perfect! Each application improves your skills, leading to better results and longer-lasting lashes.
- Heyme Beauty DIY lashes are reusable up to 30 times. Clean and store them properly to save money and reduce waste.
How Long Do DIY Lash Extensions Last?
Average Wear Time for Beginners
If you’re just starting with diy lash extensions, you might wonder how long your new look will last. For most beginners, the average lifespan of lash extensions falls between 3 and 7 days. This realistic wear time depends on a few things you can control and a few you can’t.
Here’s what usually shortens eyelash extension longevity for first-timers:
- Application technique matters a lot. If you don’t place the clusters just right, they may not stick as long.
- The adhesive you use can make or break your results. Some glues hold better than others.
- Skincare and makeup products sometimes weaken the bond, especially if they contain oils.
- Your daily habits, like how you sleep or how much you sweat, can cause lashes to come off sooner.
Don’t worry if your first set doesn’t last the full 10 days. Practice makes perfect, and you’ll get better with each try.
Longevity for Experienced Users
Once you get the hang of applying diy lash extensions, you’ll notice a big difference in how long they last. Many experienced users report their Heyme Beauty diy lashes staying fresh for up to a week. With careful prep, a strong adhesive, and a little maintenance, you can stretch that wear time to around 10 days or even longer.
- Properly attaching lash clusters to your natural lashes helps them stay put and look great.
- Take your time with prep. Clean, oil-free lashes let the adhesive form a stronger bond.
- Align the clusters carefully and press gently so the glue sets well.
- Touch up any loose clusters instead of removing the whole set.
If you want a long-lasting solution, focus on technique and aftercare. You’ll enjoy salon-worthy eyelash extensions at home and get the most out of every set.
Salon vs DIY Lash Extensions
You might wonder how diy lash extensions stack up against salon extensions. Here’s a quick comparison to help you decide which fits your lifestyle:
| Type of Eyelash Extensions | Average Longevity |
|---|---|
| DIY | 5 to 7 days |
| Salon | 2 to 4 weeks |
Salon eyelash extensions usually last longer, but diy lash extensions offer some big advantages:
- Cost-effective: You save money by skipping salon appointments.
- Convenience: Apply your lashes at home, whenever you want.
- Customization: Choose your favorite style, length, and curl for a look that’s all you.
- Learning experience: Each application teaches you more about eyelash extension longevity and technique.
Heyme Beauty diy lash extensions work well for both beginners and pros. You get a customizable, long-lasting solution that fits your schedule and budget. If you want to know how long do diy lash extensions last, you can expect a realistic wear time of 3 to 10 days, depending on your skill and care.
With practice, you’ll see your eyelash extensions lasting longer and looking better every time.
Factors Affecting DIY Eyelash Extension Longevity
Lash Prep and Cleanliness
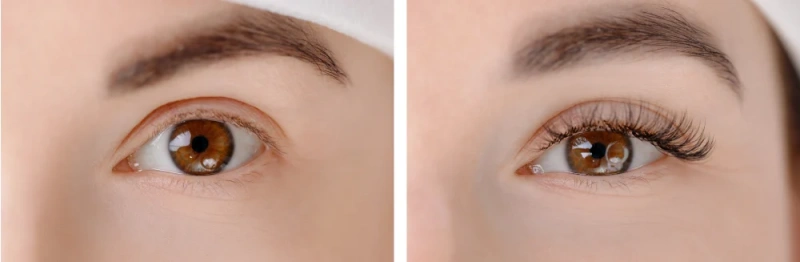
You want your lashes to last, so start with lash prep. Clean, oil-free lashes help the adhesive stick better. Use oil-free micellar water and a cotton swab to gently clean around your eyes. Remove any makeup or sweat from your eyelids. Before bed, grab a clean spoolie brush and comb through your lashes.
This keeps them separated and helps distribute natural oils. If you switch to a silk or satin pillowcase, you’ll reduce friction and keep your diy lashes looking fresh. These steps show what affects how long diy lash extensions last and what affects their lifespan.
Tip: Clean lashes mean a proper bond application and longer wear.
Adhesive Quality
Adhesive quality matters a lot for lash longevity. The right glue can make your Heyme Beauty diy lashes stay put for days. Humidity and temperature affect how the adhesive cures. High humidity makes the glue dry too fast, which can weaken the bond. Low humidity slows curing, so lashes may not attach well.
Hot weather can soften the glue and cause lashes to lift early. Choose a strong adhesive and pay attention to your environment for proper application.
Application Technique
Your application technique is key. Accurate placement of lash clusters helps them last longer. Common mistakes include using the wrong glue, not isolating natural lashes, or rushing the process. Take your time and follow the instructions in your Heyme Beauty kit.
Good technique means you get a proper bond application and your lashes stay put.
Remember: Practice makes perfect. Each time you apply, you’ll get better results.
Daily Habits and Lifestyle
Your daily habits play a big role in what affects lash longevity. Sleeping on your back keeps lashes from pressing against your pillow. Use oil-free skincare and keep products away from your eyes. Avoid rubbing your eyes and using oil-based products.
Brush your lashes gently to remove debris. If you sweat a lot during workouts, consider lowering the intensity. These habits help your diy lashes last longer.
Tips to Maximize Wear Time
Aftercare in the First 24 Hours
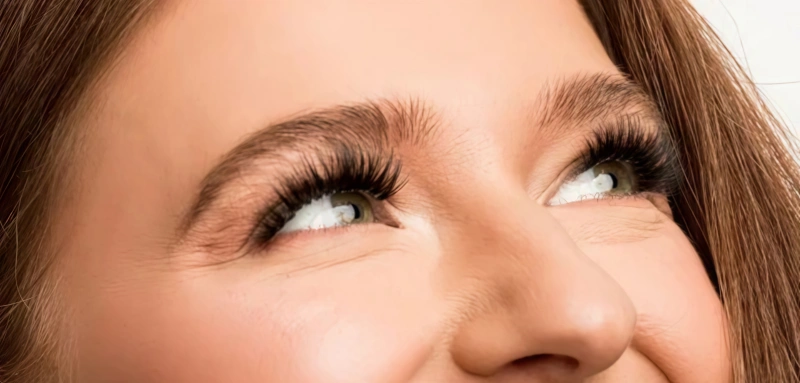
You just finished applying your Heyme Beauty diy lash extensions. Now, the first 24 hours matter most. Your aftercare routine sets the stage for how long your lashes will last. Check out this table for essential care tips:
| Do’s | Don’ts |
|---|---|
| Sleep on your back if possible | Use oil-based products near the eyes |
| Use a spoolie to gently groom them | Expose lashes to steam or water for 24h |
| Avoid touching or tugging | Rub your eyes (even when they itch!) |
Stick to these aftercare steps. You’ll maximize wear time and prolong lash extensions. Heyme Beauty kits include spoolies and instructions to help you follow the right aftercare routine.
Daily Cleaning and Grooming
Daily maintenance keeps your lashes looking fresh. Use a clean spoolie to brush your lashes every morning. This helps with proper grooming and prevents tangling. Avoid soaking your lashes. Instead, use a damp cotton swab to clean around your eyes.
You’ll remove debris without disturbing the adhesive. Heyme Beauty’s tools make daily maintenance easy.
Products to Avoid
Some products can weaken the adhesive bond. If you want your lashes to last, avoid these:
- Oil-based ingredients like mineral oil, coconut oil, argan oil, jojoba oil, castor oil, and dimethicone.
- Glycol-based ingredients such as propylene glycol, butylene glycol, PEG, and ethylene glycol.
- Chemical exfoliants include glycolic acid, lactic acid, salicylic acid, mandelic acid, and azelaic acid.
- Retinoids like retinol, tretinoin, retinyl palmitate, adapalene, and Accutane.
- Drying alcohols such as alcohol denat., SD alcohol, isopropyl alcohol, and ethanol.
Check your skincare labels. Avoid these to prolong lash extensions.
Sleeping Tips
Your sleeping position affects lash longevity. Sleep on your back to prevent rubbing your face against the pillow. Silk or satin pillowcases minimize friction. You can also use a silk or satin sleep mask for extra protection. These tips to maximize wear time help you wake up with beautiful lashes.
Want your lashes to last longer? Follow these essential care tips and daily maintenance steps. You’ll enjoy Heyme Beauty diy lash extensions that stay gorgeous day after day.
Showering, Sleeping, and Activities with DIY Lash Extensions

Showering and Water Exposure
You might wonder if you can shower with your Heyme Beauty Diy Lashes. Good news—you can! Water alone usually does not weaken the adhesive much. You just need to be careful with hot showers. Steam and heat can make the glue a bit weaker, so try to keep your showers short and not too steamy.
Oil-based products are the real enemy of lash glue, so always avoid them near your eyes.
- Keep your face out of direct water spray.
- Gently pat your lashes dry after showering.
- Skip oil-based cleansers and makeup removers.
Tip: If you want your lashes to last, focus on keeping them dry and oil-free, especially in the first 24 hours.
Exercise, Steam, and Sweat
Staying active is great, but sweat and steam can shorten the life of your diy lashes. Heavy workouts, saunas, and steam rooms all create extra moisture and heat that can loosen the adhesive.
- Avoid long, steamy showers.
- Skip saunas and steam rooms.
- Postpone swimming sessions until you’re ready to reapply your lashes.
- Be mindful during intense workouts that cause heavy sweating.
If you love to exercise, try lighter workouts or keep a towel handy to dab away sweat before it reaches your eyes.
Safe Sleep Practices
Sleeping with diy lashes can feel tricky, but you can protect your look with a few simple habits. The way you sleep matters a lot for lash longevity. If you want to know how to sleep in diy lashes, start by sleeping on your back. This keeps your lashes from rubbing against your pillow and helps them stay in place.
- Sleep on your back to avoid pressure and friction.
- Use a silk or satin pillowcase to reduce pulling and tangling.
- Try a sleep mask made for lash extensions for extra protection.
- Cleanse your lashes before bed to remove makeup and oil.
- Avoid heavy creams around your eyes at night.
- Use a neck pillow if you tend to move a lot in your sleep.
Note: Back sleeping helps your lashes keep their shape and curl. It also prevents them from getting bent or broken overnight.
With these tips, you can enjoy your Heyme Beauty Diy Lashes longer, no matter what your day—or night—brings!
Reusing and Removing Heyme Beauty Diy Lashes
When to Remove and Reapply?
You want your lashes to look fresh every time. Removing Heyme Beauty Diy Lashes is easy if you follow a few simple steps. Start with a gentle oil-based remover, like coconut oil or baby oil. Put a small amount on a cotton pad and hold it over your lashes for a few minutes. This helps loosen the glue.
Gently rub the extensions off, starting from the outer corner. If the glue feels stubborn, use steam to soften it. You can use a facial steamer or a bowl of hot water. Hold your face over the steam for about ten minutes. Apply oil along your lash line and let it sit for a couple of minutes.
If the lashes don’t come off easily, repeat the process. Be patient and avoid pulling. You’ll protect your natural lashes and keep them healthy.
Cleaning and Storage
After you remove your lashes, you need to clean them for reuse. Use a lash cleaning guide to help you get rid of adhesive residue. Pick off any leftover glue gently. Place your lashes in a clean, dry container. This keeps them safe and helps them keep their shape.
You want your lashes to stay hygienic and ready for your next application. Proper cleaning and storage make your lashes last longer.
Tip: Always clean your lashes after each use. Store them away from moisture and dust.
Reusability and Cost-Effectiveness
Heyme Beauty Diy Lashes are designed for multiple uses. You can reuse them up to thirty times. This means you save money compared to single-use lashes. Over a year, reusable lashes cost less than buying new ones every week. You get more value and help reduce waste.
Choosing reusable lashes is a smart move for your wallet and the environment.
| Benefit | Single-Use Lashes | Heyme Beauty Diy Lashes |
|---|---|---|
| Uses per set | 1 | Up to 30 |
| Yearly cost | Higher | Lower |
| Environmental impact | More waste | Less waste |
You get beautiful lashes, save money, and support sustainability—all with Heyme Beauty Diy Lashes.
Types of Heyme Beauty Diy Lashes
Heyme Beauty gives you lots of choices when it comes to diy lashes. You can pick from different materials, lengths, and curls. Each option changes how your lashes feel, how long they last, and how natural they look. Let’s break down what you can expect so you can find the perfect fit for your style and comfort.
Material Options (Mink, Faux Mink, Vegan)
You get to choose from mink, faux mink, and vegan lashes. Each type has its own feel and benefits. Some are softer, while others last longer or work better for sensitive eyes. Here’s a quick look at how they compare:
| Lash Type | Comfort Level | Longevity and Maintenance |
|---|---|---|
| Mink | Lightweight and soft, very comfortable | Easy to maintain but may wear down more quickly with use. |
| Hybrid Mink | Slightly heavier but still comfortable | Needs more care; lasts longer than mink but may need touch-ups. |
| Vegan Lashes | Not as soft as mink but still comfy | More durable and hypoallergenic, great for sensitive eyes. |
If you want the softest feel, mink lashes might be your favorite. Vegan lashes give you extra durability and are perfect if you have sensitive skin or want a cruelty-free option. Hybrid mink lashes offer a nice balance between comfort and long wear.
Tip: If you have allergies or want a sustainable choice, vegan lashes are a smart pick.
Choosing Lengths and Curls
You can also pick the length and curl that matches your vibe. Shorter lengths look more natural and last longer because they don’t get caught as much. Longer lashes give you drama but may need more touch-ups. Curls like D and DD add lift and make your eyes pop.
| Aspect | What You’ll Notice |
|---|---|
| Wear Time | Hybrid lashes can last 3 to 5 weeks with good care, matching your natural lash cycle. |
| User Satisfaction | Hybrid styles give you a natural but fuller look, which most people love. |
| Versatility | You get a middle ground—classic is subtle, volume is bold, hybrid is just right. |
You can mix and match lengths and curls for a custom look. Want a soft, everyday style? Go shorter with a gentle curl. Want to stand out? Try longer lashes with a bold curl. Heyme Beauty lets you create the lash look that fits your mood and lifestyle.
Practice and Results with Heyme Beauty Diy Lashes
Learning Curve for Beginners
You might feel nervous the first time you try Heyme Beauty Diy Lashes. That’s totally normal! Most beginners find the process much easier after just a few tries. You don’t need to be a pro to get great results. The kits come with clear, step-by-step instructions that walk you through each part of the application.
If you follow these, you’ll see improvement fast.
Here’s what most new users experience:
- You get better with each application.
- The learning curve is quick and not overwhelming.
- The instructions make it easy to understand what to do next.
You’ll probably make a few mistakes at first. That’s okay! Each attempt helps you learn. Before you know it, you’ll apply your lashes with confidence and speed. If you ever feel stuck, just review the instructions or watch a quick tutorial. Practice really does make perfect.
Tip: Set aside a little extra time for your first few applications. You’ll feel less rushed and more relaxed.
Achieving Salon-Quality Results at Home
You can create a salon-worthy look right at home with Heyme Beauty Diy Lashes. The secret is to follow a few simple steps and use the tools in your kit. Here’s a proven routine that helps you get flawless results:
- Examine your natural lashes. Check their length and fullness so you can pick the best lash clusters.
- Choose the right type of lash clusters. Decide if you want mink, faux mink, or vegan fibers for your style and comfort.
- Clean your natural lashes. Make sure they’re free from oil and makeup for the best adhesive bond.
- Prepare a lash map. Plan where you’ll place each cluster for a balanced, natural look.
- Apply the lash clusters. Use tweezers to set each cluster in place with the included adhesive.
You’ll love how customizable the process feels. You can go for a subtle, everyday look or full-on glam. With a little practice, you’ll surprise yourself with how professional your lashes look—no salon appointment needed!
Note: The more you practice, the more natural and seamless your results will become. Enjoy the process and have fun experimenting with different styles!
Conclusion
You can expect Heyme Beauty Diy Lashes to last 3–10 days with proper care. Prep, adhesive, and aftercare all play a big role in how long your lashes stay flawless. If you follow the tips in this guide, you’ll enjoy flexible, reusable lashes that fit your style and budget.
With a little practice, you can get salon-quality results at home. Many users love how easy and customizable these lashes feel.
FAQ
How long do Heyme Beauty DIY Lashes last?
You can expect your Heyme Beauty DIY Lashes to last 3–10 days. If you follow the care tips, you’ll get the most out of each set. Practice and good aftercare help you reach the longer end of that range.
Can I reuse Heyme Beauty DIY Lashes?
Yes! You can reuse your lashes up to 30 times. Clean them gently after each use and store them in the original case. This saves you money and keeps your lashes looking fresh.
Are Heyme Beauty DIY Lashes safe for sensitive eyes?
Absolutely. Heyme Beauty offers vegan and hypoallergenic options. The lashes feel lightweight and comfortable. If you have sensitive eyes, you’ll find these lashes gentle and easy to wear.
What tools come in the Heyme Beauty DIY Lash kit?
You get tweezers, lash glue, sealant, remover, and a spoolie. The kit includes everything you need for easy application and maintenance. You won’t need extra tools to get started.
Can I shower or exercise with DIY lashes?
You can shower and exercise, but avoid steam and heavy sweat. Keep your lashes dry for the first 24 hours. Pat them gently after water exposure. This helps your lashes stay in place longer.