![]()
In recent years, At Home Lashes—commonly known as DIY Lash Extensions or Cluster Lashes—have surged in popularity. And there are many people who can do it at home lashes that last 2 weeks.
The desire for long, voluminous lashes without the hefty salon price tag or the commitment to frequent appointments has led many to explore At Home Lashes. At-home lash extensions offer a convenient and affordable solution for individuals seeking a personalized lash look. In this article, you’ll discover everything you need to know about At Home Lashes, from what they are to how to apply and maintain them for up to two weeks.
What Are At Home Lashes?
Definition and Types: Cluster Lashes vs Individual Lashes vs DIY Extensions
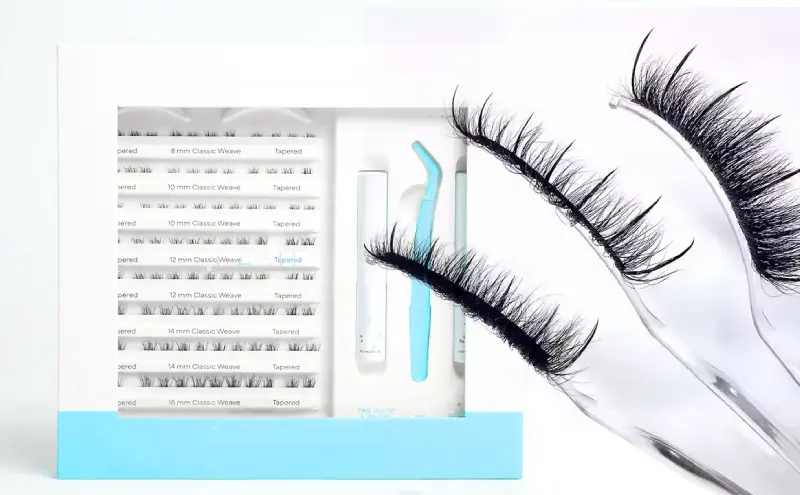
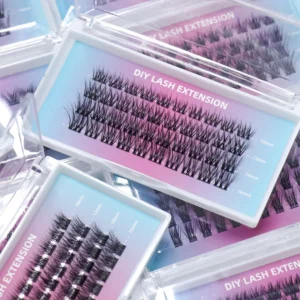
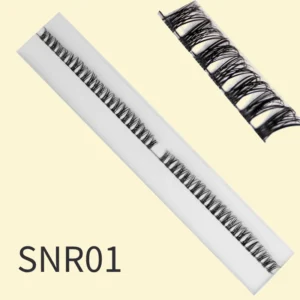
At Home Lashes encompass several types of false lashes, with Cluster Lashes and DIY extensions being the most common. Cluster lashes are pre-made sets of several lashes grouped together, offering volume in one easy-to-apply piece. These are perfect for those looking for a fuller lash look without the complexity of applying individual lashes. On the other hand, individual lashes are single lash strands that require more time and skill to apply but offer a more customizable, natural look.
DIY lash extensions, also known as semi-permanent lash clusters, are designed to mimic professional lash extensions in the comfort of your own home. These extensions are applied directly to the natural lashes using a special adhesive, and they can last anywhere from a few days to two weeks with proper care.
How They Work: Simple Application for Non-Professionals
The application process of At Home Lashes is relatively straightforward. Unlike traditional lash extensions that require a salon appointment and professional skills, DIY lash extensions come with easy-to-follow instructions, making them accessible for beginners. Whether you’re using cluster lashes or individual extensions, the process typically involves applying adhesive to each lash cluster or extension and attaching them to your natural lashes.
Difference from Traditional Lash Extensions
Traditional lash extensions involve a professional lash artist who individually applies each extension to your natural lashes. This process can be time-consuming, taking up to two hours. The application lasts longer, usually around 3 to 4 weeks, but at a higher cost—often hundreds of dollars.
At Home Lashes, in contrast, offer a more affordable alternative. The application is done by the wearer, and while they may not last as long as salon extensions, they can last up to two weeks with proper care. Plus, they are much less expensive, making them an attractive option for anyone looking for a quick lash fix.
Why Choose At Home Lashes?
Cost-Effective
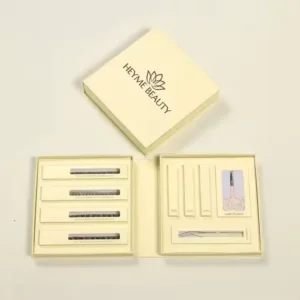
The most appealing benefit of At Home Lashes is their affordability. Traditional salon lash extensions can cost anywhere from $100 to $300 or more. In contrast, DIY lash extensions can be purchased for a fraction of that price, with many kits available for under $50. This significant price difference makes At Home Lashes a great option for those on a budget or those who want to enjoy beautiful lashes without breaking the bank.
Convenience
Another major benefit of At Home Lashes is the convenience factor. With salon extensions, you must book an appointment, drive to the salon, and spend several hours in a chair. With DIY lash extensions, you can apply them at home whenever it suits you. This saves both time and effort, making them a perfect solution for those with busy schedules.
Customization
DIY lash extensions offer unparalleled customization. You can adjust the style, length, and volume to match your preferences. Whether you want a natural look for everyday wear or dramatic lashes for a special occasion, you have full control over the outcome.
Comfort
At Home Lashes allow you to apply lashes at your own pace, in a comfortable setting. You can take your time, making adjustments as you go, and ensure that you’re happy with the results before committing to a full lash look. For those who are new to applying lashes, this is a great way to get comfortable with the process.
How to Apply At Home Lashes That Last 2 Weeks
Preparation
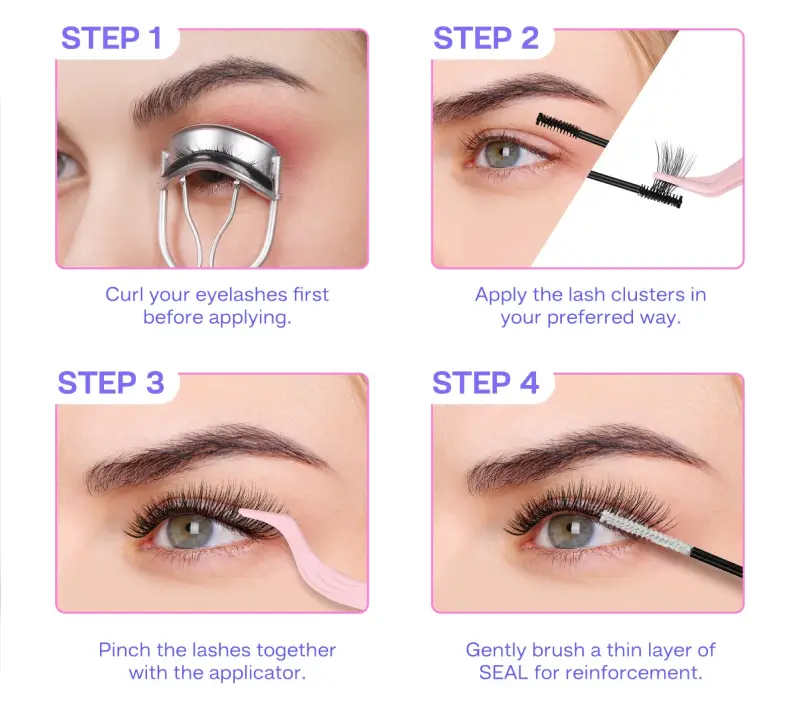
Before you begin applying your At Home Lashes, proper preparation is key to achieving the best results. First, cleanse your natural lashes thoroughly to remove any makeup, oils, or dirt. Use a gentle, oil-free makeup remover and avoid any oil-based products that may interfere with the adhesive. Next, prime the area by lightly curling your natural lashes with an eyelash curler. This helps to create a smooth base for the lash application.
Step-by-Step Application
- Prepare the Lashes: If you’re using individual lashes, separate them from the tray. For cluster lashes, you can start applying them as they come.
- Apply the Adhesive: Place a small amount of adhesive on a clean surface, such as a piece of aluminum foil. Use a lash applicator or tweezer to dip the base of each lash into the glue. Make sure not to use too much adhesive, as this can cause clumping.
- Attach the Lashes: Using your applicator or tweezers, place the lashes on your natural lashes, starting from the outer corner of your eye. Ensure each lash cluster is placed as close to the lash line as possible for a seamless blend.
- Repeat the Process: Continue applying the lashes along your lash line until you reach the inner corner of your eye. Take care to space them evenly for a natural look.
Tips for Avoiding Mistakes
To avoid common mistakes, make sure to apply the lashes gently and carefully. Avoid pressing the lashes too hard, as this can cause discomfort or irritation. Always check that the adhesive has dried fully before touching or adjusting the lashes to avoid smudging.
How to Ensure Long-Lasting Results (Up to 2 Weeks)
Choosing the Right Adhesive
The adhesive you use is crucial for the longevity of your At Home Lashes. Look for a high-quality, waterproof lash adhesive that is specifically designed for DIY lash extensions. These glues are formulated to be strong enough to hold the lashes in place for up to two weeks, even in humid conditions.
Proper Application Technique
To ensure your lashes stay secure, make sure the adhesive is applied evenly to the lash clusters or extensions. Avoid over-applying glue, as too much adhesive can cause the lashes to stick together or look unnatural.
Maintaining Lash Health
While wearing At Home Lashes, it’s essential to keep your natural lashes healthy. Avoid touching, rubbing, or pulling on your lashes, as this can cause premature shedding or damage to your natural lashes. Also, try to avoid using oil-based makeup removers, as these can break down the adhesive and cause your lashes to fall off early.
Sleep and Lifestyle Tips
To prolong the life of your At Home Lashes, sleep on your back and avoid any activities that might cause them to come into contact with excessive moisture or friction. If you wear makeup, opt for water-based products to avoid weakening the adhesive.
Aftercare for At Home Lashes

Cleaning and Maintenance
To keep your At Home Lashes looking fresh, clean them regularly. Use a gentle, oil-free makeup remover to remove any makeup or dirt buildup. Use a soft brush or spoolie to gently comb through the lashes, being careful not to pull or tug on them.
Avoiding Common Lash Issues
If you notice that your lashes are lifting or becoming loose, check for any excess glue or debris. Gently reapply adhesive to the affected areas to secure the lashes.
Refreshing Lashes
As your At Home Lashes begin to wear down, you can refresh them by applying new lash clusters to any gaps or areas where the lashes have fallen off. This will help extend the life of your lash look without needing a full reapplication.
How to Remove Lashes Safely
When it’s time to remove your At Home Lashes, be gentle. Use an oil-free remover to break down the adhesive, then carefully peel the lashes off starting from the outer corner. Never tug or pull on the lashes, as this can damage your natural lashes.
Troubleshooting and Common Issues
What to Do If Your Lashes Start Falling Off Early
If your lashes start falling off prematurely, check the adhesive for any signs of wear or moisture exposure. Reapply the glue and ensure the lashes are securely attached.
Dealing with Discomfort or Irritation
If your lashes feel uncomfortable or cause irritation, remove them immediately and check for any allergic reactions or incorrect adhesive application. It’s important to follow proper application steps to avoid discomfort.
Why Lashes Might Not Last 2 Weeks
Several factors can affect lash longevity, including the quality of the adhesive, lifestyle habits, and exposure to moisture. Avoid using oil-based products or excessive rubbing, as this can cause the lashes to fall off sooner.
FAQs
Can I Wear Makeup with At Home Lashes?
Yes, you can wear makeup with At Home Lashes, but be careful not to use oil-based products, as these can weaken the adhesive.
How Long Can I Wear At Home Lashes Before Needing a Touch-Up?
With proper care, At Home Lashes can last up to two weeks before needing a touch-up.
Are At Home Lashes Suitable for Sensitive Eyes?
Yes, there are adhesive options and lash types specifically designed for sensitive eyes. Always patch-test before applying.
Can I Reuse My At Home Lashes?
Yes, if well-maintained, you can reuse At Home Lashes several times.
Conclusion
At Home Lashes offer a convenient, cost-effective, and customizable alternative to traditional salon lash extensions. With the right tools, techniques, and care, you can achieve long-lasting, voluminous lashes that enhance your natural beauty. Ready to try DIY lash extensions for yourself? Explore the best products and start your At Home Lash journey today!