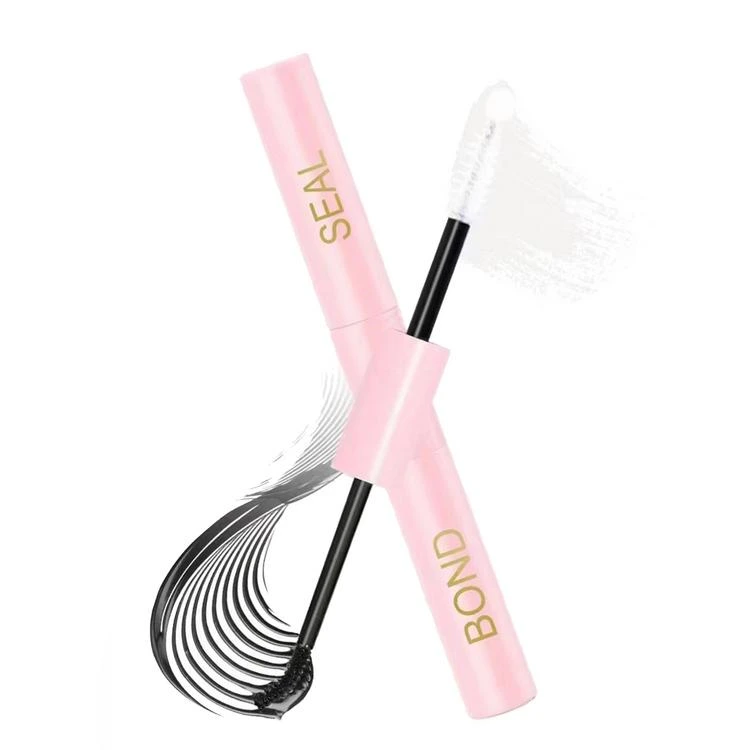
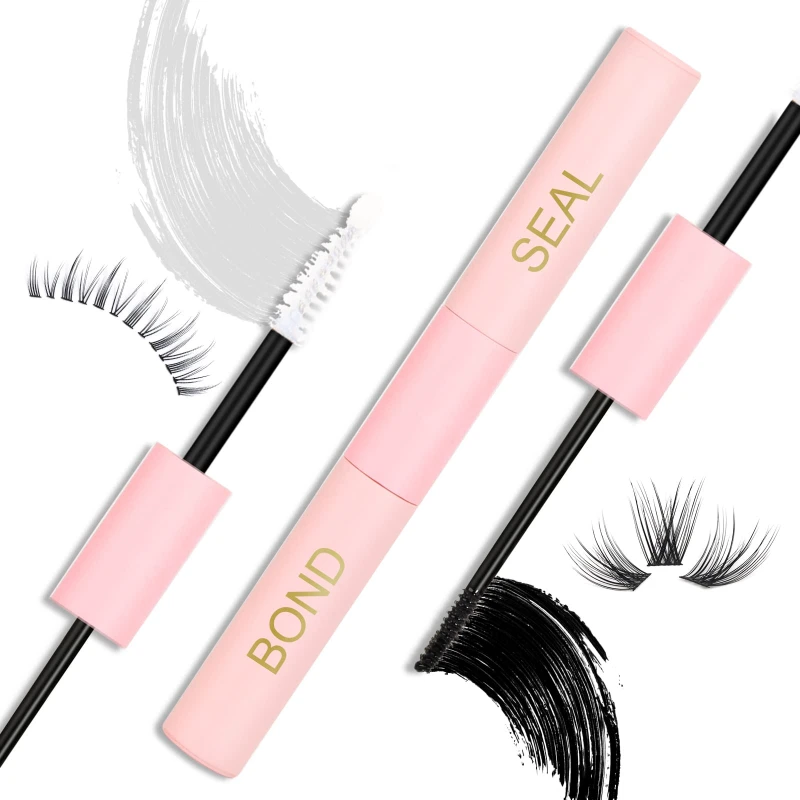
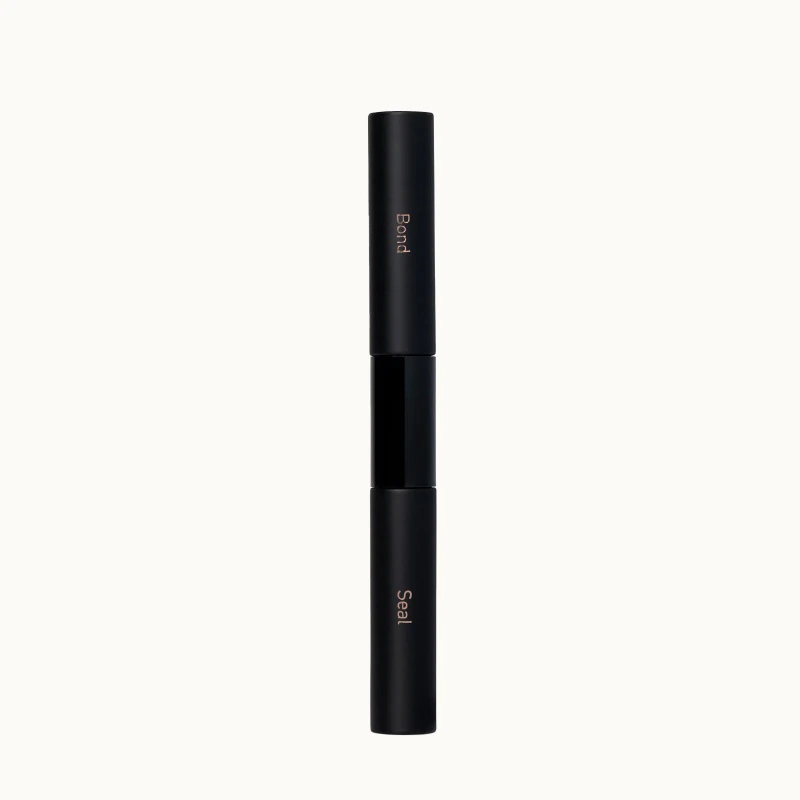
Lash Bond and Seal is a must-have for long-lasting, secure lash extensions. This product works by bonding your lashes to the natural lashes, creating a strong, flexible hold. The seal locks in the bond, ensuring your lashes stay in place all day without irritation. Easy to apply and quick-drying, it’s the perfect solution for professional results. For flawless, long-lasting lashes, try Lash Bond and Seal today! Secure your look now with Lash Bond and Seal!
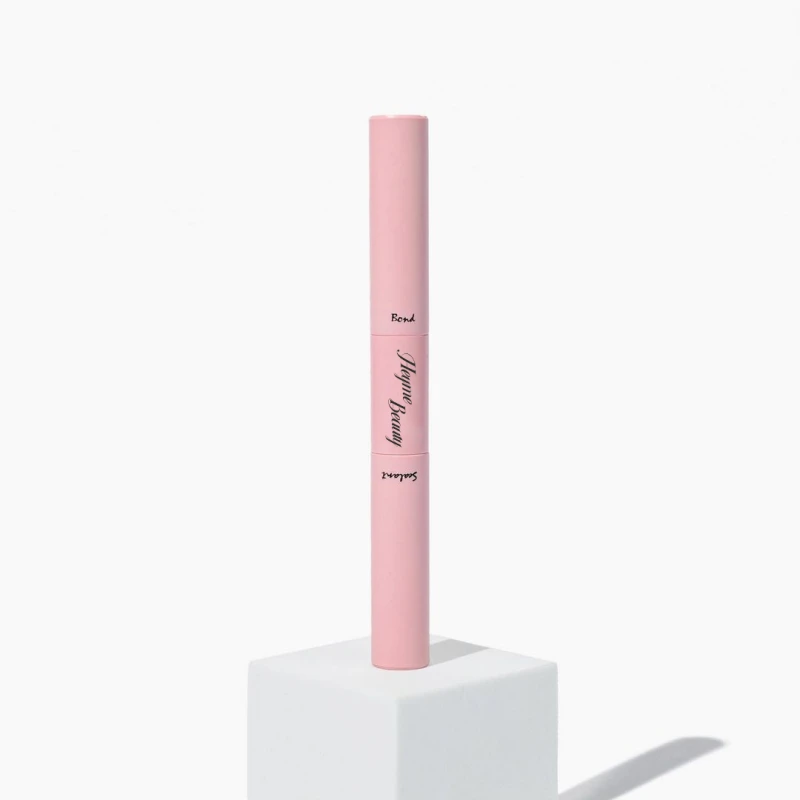
Looking for different types of best lash bond and seal at an affordable price? Discover high-quality, customizable options that suit every style and preference. Our lash glue bond and seal offer durability, comfort, and a flawless finish, enhancing your beauty without breaking the bank. Ready to elevate your lash game? Get your quote for lash bond and seal at Heyme Beauty today!
Best Waterproof Lash Bond and Seal is your go-to solution for durable, all-day lash wear. It creates a strong bond between your lash extensions and natural lashes while the waterproof formula ensures they stay in place, even in humid or wet conditions. No more worrying about smudging or lifting—this bond stays intact through sweat, rain, or tears. For a reliable, long-lasting hold, choose lash bond and seal waterproof for flawless lashes every time.
Hypoallergenic Lash Bond and Seal is perfect for sensitive eyes. Its gentle, hypoallergenic formula ensures a strong, secure bond without irritation or discomfort. This lash adhesive works to hold your extensions in place all day while remaining kind to your skin. Whether you have delicate eyes or simply prefer a milder option, Lash bond and seal for sensitive eyes is the ideal choice for a flawless, irritation-free lash experience.
Hypoallergenic Lash Bond and Seal is perfect for sensitive eyes. Its gentle, hypoallergenic formula ensures a strong, secure bond without irritation or discomfort. This lash adhesive works to hold your extensions in place all day while remaining kind to your skin. Whether you have delicate eyes or simply prefer a milder option, Hypoallergenic Lash Bond and Seal is the ideal choice for a flawless, irritation-free lash experience.
Longest Lasting Lash Bond and Seal is formulated to keep your lash extensions secure for 7 to 14 days. This powerful bond provides a strong, long-lasting hold that stands up to daily wear, ensuring your lashes stay flawless without lifting or smudging. The sealing formula locks everything in place, giving you extended wear without the need for touch-ups. For the ultimate durability and reliability, try our long lasting lash bond and seal for beautiful lashes that last!
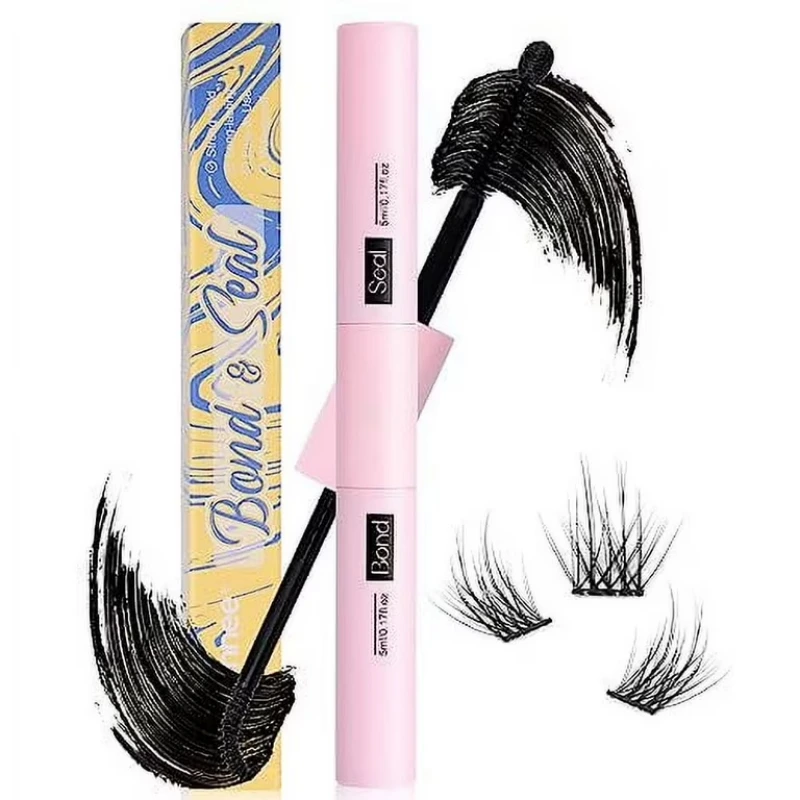
Black Eye Lash Bond and Seal is the perfect solution for a sleek, bold lash look. This formula not only securely bonds your lash extensions to your natural lashes but also adds a subtle, black tint for added definition. The sealing action ensures your lashes stay in place, while the black finish enhances the overall look for a fuller, more dramatic effect. For a striking, long-lasting lash style, try Black Eye Lash Bond and Seal today!
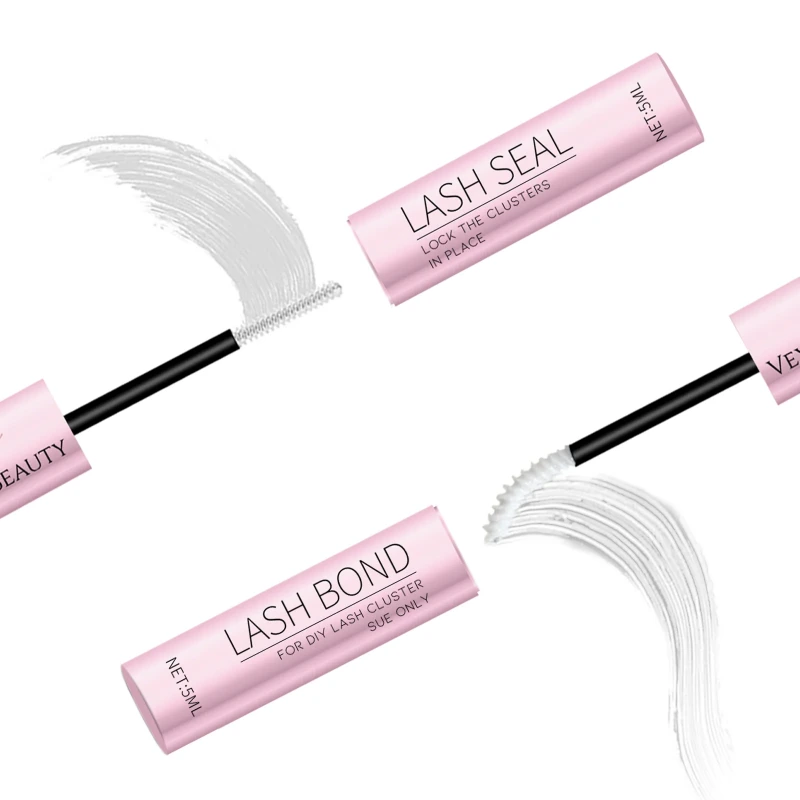
Clear Lash Bond and Seal is the ideal choice for a flawless, custom lash application. This clear formula bonds your lash extensions securely to your natural lashes and seals the bond for extra durability. Its white finish dries clear, ensuring a seamless, natural look with no visible residue. Perfect for DIY lash lovers, this product provides long-lasting hold and reliable results. Try White Best DIY Lash Bond and Seal for a smooth, professional finish every time.
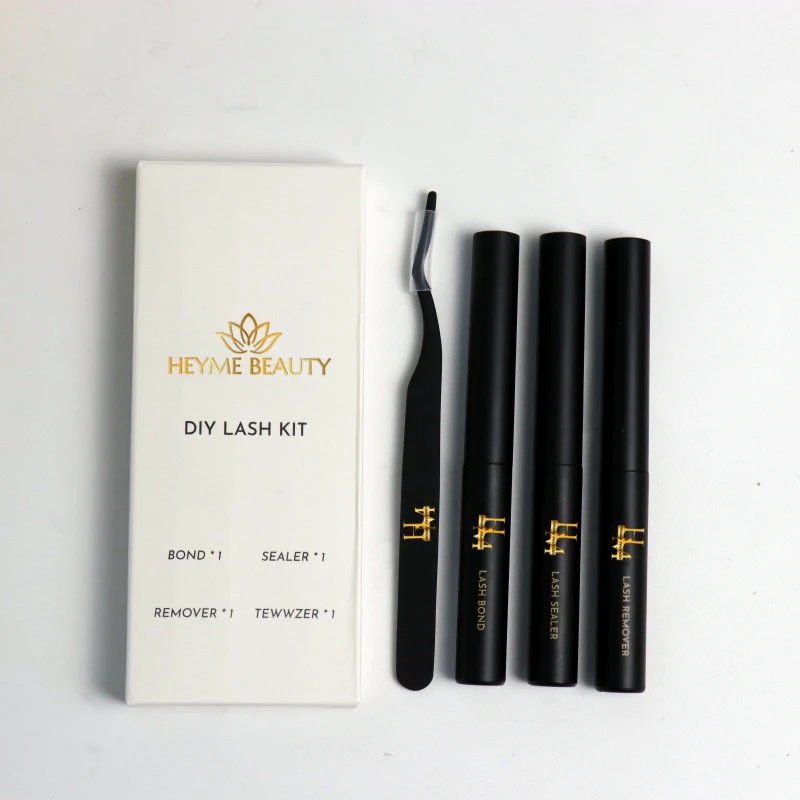
The 4 In 1 Lash Bond and Seal Kit is your complete solution for flawless lash extensions. This all-in-one kit includes a bond for secure application, a sealant for long-lasting hold, a remover for easy cleanup, and a precision tweezer for perfect placement. Each tool is designed to make your lash application process smooth and professional. With everything you need in one kit, achieve stunning, durable lashes with ease. Try the 4 In 1 Lash Bond and Seal Kit today!
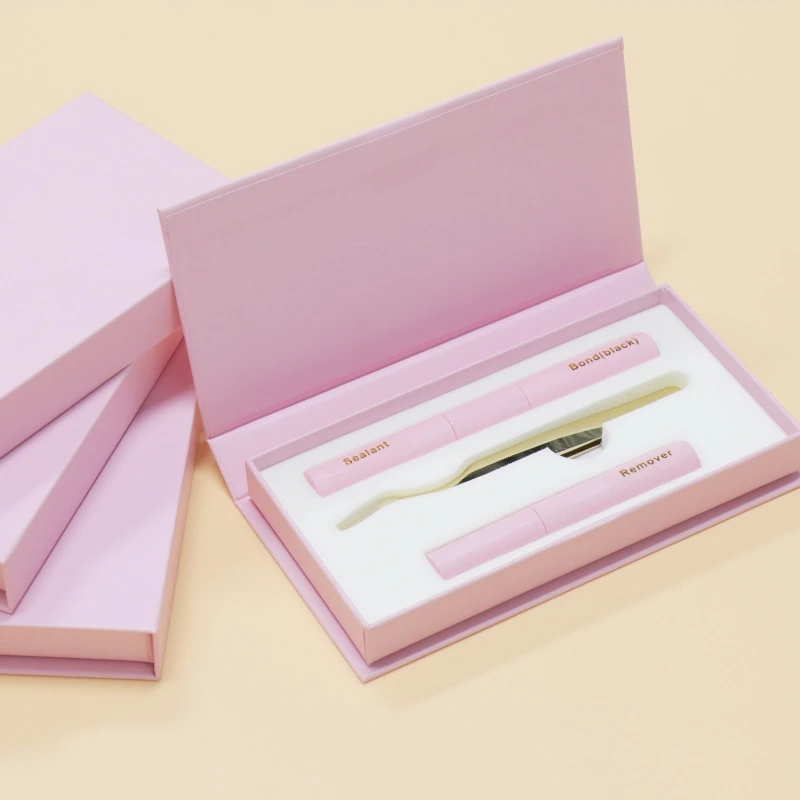
The 3 In 1 Bond and Seal Lash Set is the perfect starter kit for flawless lash extensions. It includes a bond and sealant to ensure your lashes stay securely in place, a remover for easy and gentle cleanup, and a precision lash tweezer for perfect placement. Designed for both beginners and pros, this set offers everything you need to achieve a long-lasting, natural-looking lash style. Make your lash application effortless with the 3 In 1 Bond and Seal Lash Set.
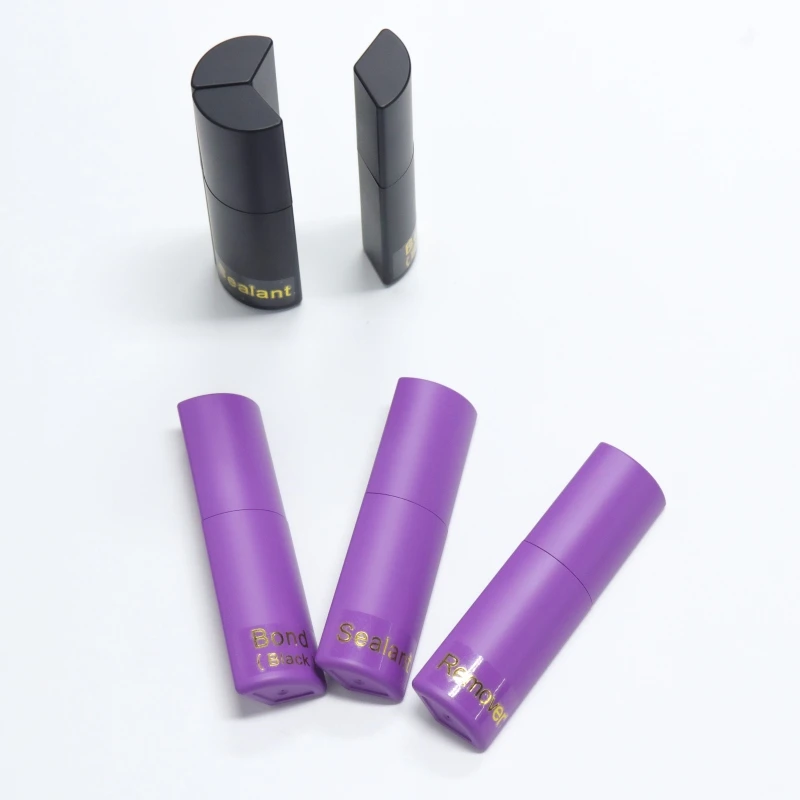
The 3 In 1 lash bond and seal remover combines a bond, sealant, and remover in one convenient product. This all-in-one solution simplifies your lash routine by providing a strong bond for extensions, a sealant for lasting hold, and a gentle remover for easy lash removal. With its innovative magnetic design, it ensures precise application and effortless use. Perfect for quick, effective lash extension care, the 3 In 1 bond and seal lash glue remover is a must-have for your beauty kit.
Cluster lashes are a quick and easy way to add volume and length to your lashes. With the right tools and technique, you can achieve a professional-looking lash extension at home. Here’s a simple step-by-step guide on how to apply cluster lashes using bond and seal for a long-lasting, flawless finish.
What You’ll Need:
Cluster lashes
Lash Bond and Seal (with bond and sealant)
Tweezers
Lash applicator (optional)
Cotton swabs
Mirror
Step 1: Prepare Your Natural Lashes
Start by cleaning your natural lashes. Use a gentle makeup remover or lash cleanser to remove any dirt, oil, or makeup. Dry your lashes thoroughly before proceeding.
Step 2: Apply the Lash Bond
Using the applicator or brush that comes with the lash bond, apply a thin layer of bond to your natural lashes. Be careful not to get the bond on your eyelid or in your eyes. Wait for about 30 seconds for the bond to become tacky before moving on to the next step.
Step 3: Apply the Cluster Lashes
Take a cluster lash with your tweezers and dip the base of the cluster into the bond. Place the cluster lash along your natural lash line, starting from the outer corner. Gently press it down using the tweezers to ensure it sticks. Repeat this process, applying clusters one by one, making sure they’re spaced evenly for a natural look.
Step 4: Seal the Lashes
Once all the clusters are in place, apply a layer of lash sealant to the bond. The sealant will help lock the lashes in place and add extra longevity to your lash look. Gently apply the sealant from the base of the lashes to the tips, making sure not to touch the clusters too much.
Step 5: Allow Lashes to Dry
Let the lashes dry for a few minutes. The bond should set, and the sealant will ensure a long-lasting hold. Avoid touching your lashes during this time to prevent them from shifting.
Step 6: Final Touches
Once the lashes are fully dry, you can use a cotton swab to remove any excess bond or sealant around your lash line. If needed, you can also lightly curl your natural lashes with a lash curler to blend the clusters with your natural lashes.
Step 7: Enjoy Your New Look
Now that your cluster lashes are securely applied and sealed, you’re ready to go! Enjoy your fuller, more voluminous lashes with a long-lasting hold.
Tips for Best Results:
Apply a little more bond to the outer corners of the lashes for extra hold.
Use a gentle hand when applying the bond and seal to avoid over-application.
Make sure the sealant is evenly distributed to ensure maximum durability.
By following these simple steps, you can achieve beautiful, voluminous lashes that last all day! Try using cluster lashes with bond and seal for a flawless look.
Removing lash bond and seal can be quick and easy with the right technique. Whether you’re ready to take off your lash extensions or need to do a touch-up, following these steps will ensure your lashes stay healthy and your skin remains safe. Here’s a simple step-by-step guide on how to remove lash bond and seal properly.
What You’ll Need:
Lash bond remover or oil-based makeup remover
Cotton pads or cotton swabs
Gentle facial cleanser
Clean towel
Mirror
Step 1: Prep Your Lashes
Start by washing your hands thoroughly. Gently cleanse your face and lashes using a mild facial cleanser to remove any makeup or dirt. Pat your face dry with a clean towel. This ensures you’re working on a clean surface and prevents bacteria from interfering with the process.
Step 2: Apply Lash Bond Remover
Apply a small amount of lash bond remover or an oil-based makeup remover to a cotton pad or cotton swab. Make sure to choose a remover that’s designed specifically for lash adhesive to avoid any irritation. Hold the cotton pad against your lash line for 10-15 seconds. This will help loosen the bond and make it easier to remove the lashes.
Step 3: Gently Remove the Lashes
Using your tweezers or fingers, gently lift and remove the lash extensions from your natural lashes. Start at the outer corner and carefully work your way inward. Avoid pulling or tugging at your natural lashes to prevent damage. If the bond is still strong, reapply the remover and wait a little longer before trying again.
Step 4: Cleanse Your Lashes
Once the lash extensions are removed, use a clean cotton pad with some gentle facial cleanser to wipe your natural lashes. This will remove any leftover bond or sealant. Be sure to cleanse your lashes thoroughly to prevent any product buildup.
Step 5: Moisturize Your Lashes
After removing the bond and seal, apply a lash serum or nourishing oil to keep your natural lashes hydrated. This helps promote healthy lash growth and keeps your lashes feeling soft and conditioned.
Step 6: Avoid Rubbing Your Eyes
Resist the urge to rub or touch your eyes right after removing the lashes. Give your natural lashes some time to breathe and recover from the removal process.
Step 7: Final Touches
Once your lashes are clean and free of any bond or sealant, you can apply mascara or lash extensions again if you choose. Always be gentle during the re-application process to avoid causing any damage to your natural lashes.
Tips for Best Results:
Never force or pull the lashes off. If they’re not coming off easily, give the remover a little more time to work.
Always use a remover that’s safe for your eyes to avoid irritation.
Clean your lashes regularly to prevent excess build-up of bond or sealant.
By following these simple steps, you can safely and easily remove lash bond and seal without harming your natural lashes. Treat your lashes with care, and they’ll stay healthy and ready for your next stunning lash look!
Bond and seal for lashes is a two-step system designed to ensure lash extensions stay in place for a long time. The “bond” is a glue or adhesive that securely attaches the lash extensions to your natural lashes, while the “seal” acts as a topcoat to lock the bond in place, preventing lifting and extending the wear time. This combination provides long-lasting, smudge-proof results.
To apply cluster lashes with bond and seal, first clean your natural lashes and apply a thin layer of the lash bond. Wait a few seconds for the bond to become tacky, then use tweezers to pick up a cluster lash and gently place it along your natural lash line. After securing each cluster, apply a layer of the seal to ensure the bond lasts longer. Allow the lashes to dry completely for the best hold.
Lashes applied with bond and seal typically last anywhere from 7 to 14 days, depending on the product used and how well the lashes are cared for. The bond provides a strong hold, while the seal helps prevent the lashes from lifting or coming undone. To extend their wear, avoid rubbing your eyes or using oil-based makeup removers.
To apply individual lashes with bond and seal, start by cleaning your natural lashes. Apply a thin layer of bond to your natural lashes, allowing it to become tacky. Then, use tweezers to pick up each individual lash and place it carefully along your natural lash line. After applying the lashes, seal them with the lash sealant for extra durability. Allow the lashes to dry completely before touching them.
Bond and seal is generally designed for individual or cluster lashes, but it can be used on strip lashes as well. Apply the bond to your natural lashes and the base of the strip lash, then press the strip onto your lash line. After securing the strip, apply the sealant to ensure the lash stays in place. This method provides added durability and helps the strip lash stay secure for longer periods.
Please feel free to contact us now if you are interested in our Lash Seal and Bond~
If you are looking for a professional eyelash manufacturer in China, HeyMe Beauty will be your best choice. We provide mink lashes, magnetic lashes, vegan lashes, eyeliners, and many other eye makeup products, also the solution to help your lash business.
Get FREE lash samples and let us help you start your lash business.
Get Free Lash Samples!