![]()
In the competitive world of lash artistry, stunning photos are more than just eye candy; they’re powerful marketing tools. High-quality images showcase your skills, attract new clients, and build your brand. But capturing the true beauty of a set of lashes can be tricky.
This guide will equip you with the essential tips and techniques to take captivating lash extension photos that will make your work shine. From lighting and composition to editing and showcasing your masterpieces, we’ll cover everything you need to know to elevate your lash photography game.
Let’s dive in and learn how to capture the magic of your lash artistry through stunning visuals!
Why Take Lash Extension Pictures
Taking high-quality photos of your lash extension work is crucial for several reasons:
Build Your Portfolio:
- Showcase Your Skills: Photos are your visual portfolio. They demonstrate your artistry, attention to detail, and the quality of your work to potential clients.
- Attract New Clients: Stunning photos on social media platforms like Instagram and Facebook can attract new clients seeking a skilled lash artist.
Marketing and Promotion:
- Social Media Presence: High-quality photos are essential for creating engaging social media content.
- Website and Online Platforms: Use photos to enhance your website, online booking platforms, and other marketing materials.
Client Satisfaction:
- Visual Confirmation: Photos allow clients to see the results of their lash extensions and appreciate the transformation.
- Shareable Content: Clients can share the photos on their own social media, which can generate word-of-mouth referrals for your business.
Professionalism:
- Brand Building: Consistent, high-quality photos contribute to a professional brand image.
- Client Experience: Taking photos of your work demonstrates a commitment to quality and professionalism.
By investing time and effort into taking great lash extension photos, you can significantly enhance your business’s success and build a strong online presence.
How to Take Good Lash Extension Pictures
Taking high-quality photos of your lash extension work is crucial for showcasing your artistry and attracting new clients.
Here’s a detailed guide about how to take good lash extensions pictures in the following:
Step 1. Preparation is Key:
- Cleanliness: Ensure the client’s face is clean and free of any makeup residue. This will prevent unwanted glare and shadows in the photos.
- Lash Prep: Brush through the lashes gently to remove any debris or stray extensions. This will ensure the lashes look their best in the photos.
- Client Comfort: Make sure the client is comfortable and relaxed. A tense expression can negatively impact the photo.
Step 2. Lighting is Everything:
Natural Light:
- Ideal: Soft, natural light from a window is often the most flattering.
- Avoid Direct Sunlight: Direct sunlight can create harsh shadows and wash out the color of the lashes.
- Consider the Time of Day: Early morning or late afternoon light often provides the best results.
Artificial Lighting:
- Ring Lights: A professional ring light can provide even, flattering illumination.
- Softboxes: Softboxes diffuse the light, creating a softer, more flattering look.
- Avoid Harsh Shadows: Position the lights to avoid creating harsh shadows under the eyes or on the face.
Step 3. Camera Techniques:
Camera Choice: Use a high-quality camera (DSLR, micro-lens, mirrorless, or even a high-resolution smartphone) with a good macro lens if possible.
Focus: Ensure the camera is focused sharply on the eyes.
Angles: Experiment with different angles to find the most flattering perspective.
- Straight-on: Capture the full lash line.
- Slightly Upward: Show off the curl and length of the lashes.
- Side Angle: Highlight the fullness and volume of the lashes.
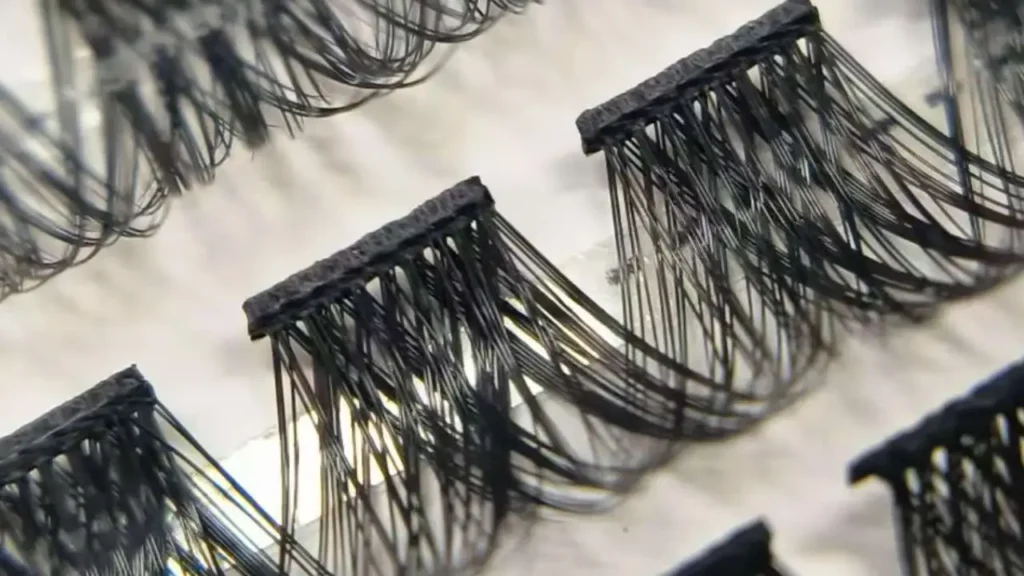
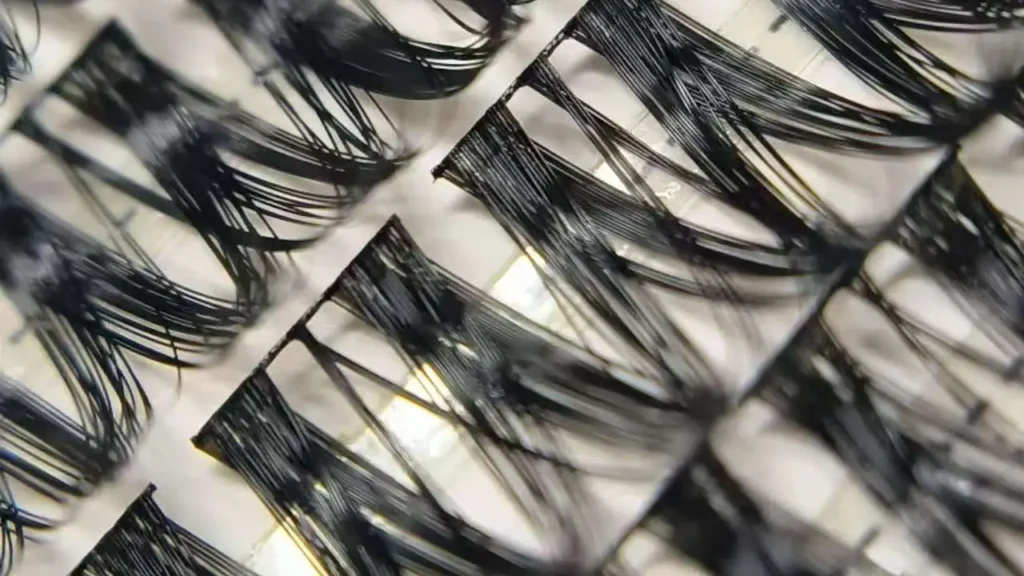
Close-ups: Take close-up shots to showcase the detail of the lash work.
Step 4. Background and Setting:
- Simple Background: Use a plain, neutral background (e.g., white, black, or a soft color) to avoid distractions.
- Clean and Minimalist: Keep the background clutter-free to draw attention to the lashes.
- Consider Props: You can use simple props like flowers or jewelry to add a touch of personality.
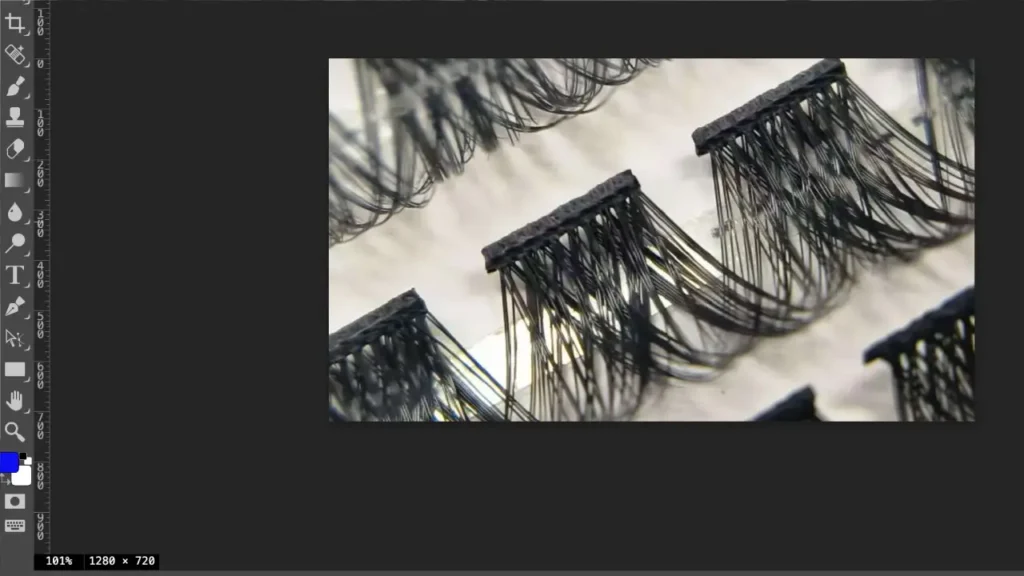
Step 5. Editing and Post-Processing:
- Enhance, Don’t Over-Edit: Use photo editing software (like Lightroom or Photoshop) to enhance the photos, but avoid over-editing.
- Adjust Brightness and Contrast: Adjust the brightness and contrast to ensure the lashes are visible and the colors are accurate.
- Remove Imperfections: Carefully remove any blemishes or distractions in the background.
- Add Filters (Sparingly): Consider using subtle filters to enhance the overall look of the photos.
Step 6. Practice and Experimentation:
- Experiment with Different Techniques: Try different lighting setups, angles, and editing styles to find what works best for you.
- Get Feedback: Ask for feedback from other lash artists or clients to improve your photography skills.
- Consistency: Develop a consistent style and branding for your photos.
By following these tips and practicing regularly, you can capture stunning lash extension photos that showcase your artistry and help you attract new clients.
Remember: Always obtain client consent before taking and sharing photos of their lash extensions.
How to Use Micro-Lens to Shoot Lash Extensions
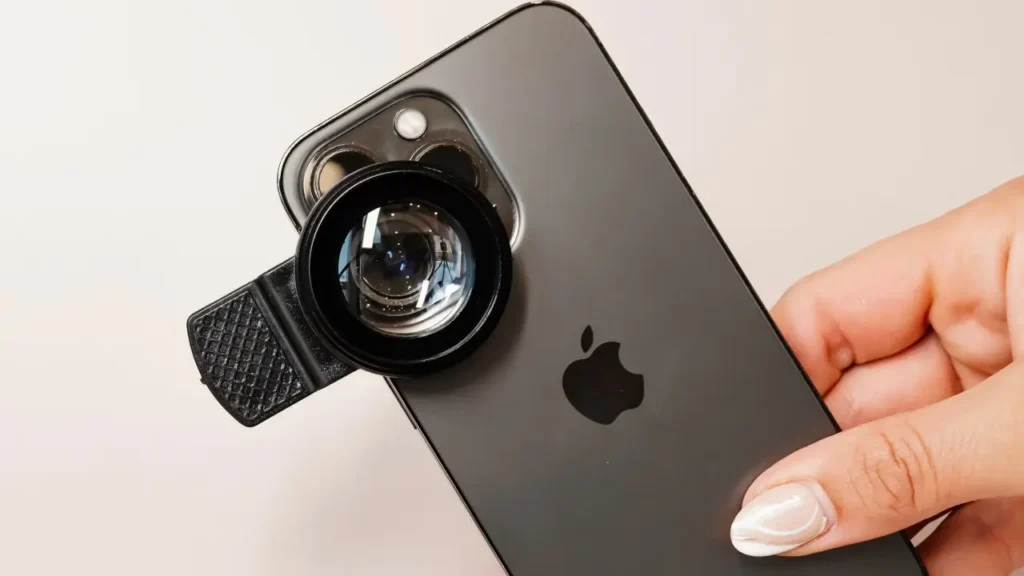
Using a micro-lens on your phone camera can significantly enhance your lash extension photography.
PS: A micro-lens is a very small lens, typically with a diameter less than a millimeter and often as small as 10 micrometers.
Here’s how to use it effectively:
Step 1. Choose the Right Micro-Lens:
- Quality Matters: Invest in a high-quality micro-lens designed for smartphones. Look for lenses with good clarity, minimal distortion, and easy-to-use clips.
- Consider a Ring Light Lens: Some micro-lenses incorporate a built-in ring light, which can be very helpful for illuminating the lashes.
Step 2. Prepare for the Shot:
- Clean the Lens: Ensure both your phone camera lens and the micro-lens are clean and free from dust or smudges.
- Steady Hands: Use a tripod or find a stable surface to place your phone on to minimize camera shake.
Step 3. Attach and Adjust:
- Secure the Lens: Carefully attach the micro-lens to your phone camera according to the manufacturer‘s instructions.
- Find the Focus: Experiment with the distance between the lens and the lashes to achieve the sharpest focus.
- Adjust Lighting: If using a ring light lens, adjust the brightness to avoid over-exposing the image.2
Step 4. Capture the Shot:
- Steady and Close: Hold the phone or tripod steady and slowly move it closer to the lashes until they come into sharp focus.3
- Experiment with Angles: Try different angles to capture the full beauty of the lash extensions.
- Multiple Shots: Take multiple photos to ensure you get the best possible shot.
Step 5. Editing (Optional):
- Enhance the Image: Use a photo editing app to adjust brightness, contrast, and saturation to enhance the image.
- Crop and Resize: Crop the image to focus on the lashes and resize it for social media or other platforms.
Tips for Success:
- Practice Makes Perfect: Experiment with different techniques and lighting conditions to find what works best for you.
- Client Comfort: Ensure the client is comfortable and relaxed during the photo session.
- Natural Light: If possible, utilize natural light for a softer, more flattering look.
By following these tips, you can use a micro-lens to capture stunning, high-definition photos of your lash extension work that will showcase your artistry and attract new clients.
Lash Extension Photoshoot Ideas
Here are some good lash extension photoshoot ideas that you can consider to enhance your lash extensions pictures.
Classic & Elegant:
- Monochrome Magic: Shoot against a stark white or black backdrop. This emphasizes the shape and definition of the lashes.
- Close-Ups: Focus on the eyes, capturing the length, curl, and fullness of the extensions.
- Soft Focus: Use a shallow depth of field to blur the background and draw attention to the eyes.
Dramatic & Edgy:
- Smoky Eyes: Pair the lashes with a dramatic smoky eye makeup look.
- Winged Liner: Create a sharp winged eyeliner to complement the length and lift of the lashes.
- Bold Colors: Experiment with colorful eyeshadows or eyeliner for a vibrant and artistic look.
Natural & Everyday:
- Daylight Shots: Capture the lashes in natural light to showcase their subtle enhancement.
- Candid Poses: Photograph the model engaged in everyday activities to demonstrate the natural look and wearability of the extensions.
- Focus on Expression: Capture the model’s eyes open and closed to showcase the flutter and movement of the lashes.
Creative & Artistic:
- Abstract Backgrounds: Use interesting textures or patterns as backdrops.
- Water Drops: Add a few drops of water to the lashes for a unique and artistic effect.
- Use Props: Incorporate delicate props like flowers, feathers, or jewelry to add visual interest.
Tips for All Lash Picture Shoots:
- Cleanliness is Key: Ensure the model’s face is clean and makeup is minimal or non-existent.
- Good Lighting: Use natural light or professional lighting to avoid harsh shadows.
- Client Comfort: Make sure the model is comfortable and relaxed.
- Editing: Use photo editing software to enhance the photos, but avoid over-editing.
Conclusion:
High-quality pictures are crucial for showcasing your lash artistry and attracting new clients. By following these tips – from proper lighting and camera angles to effective editing techniques – you can capture stunning images that truly represent the beauty of your lash work.
Ready to elevate your lash game with stunning results?
Invest in premium lash extensions from HeyMeBeauty. Our high-quality lashes extensions are designed to create beautiful, long-lasting results that will look amazing in any photo.
Visit our website today and explore our wholesale options to discover the perfect lashes for your business.