![]()
I still remember the first time I opened a brand-new lash extension tray, excited to start a full set.
Everything looked perfect.
The curls were symmetrical. The alignment was clean. The fibers had that soft satin finish we all love. I reached in with my tweezers, gripped the first lash at the base… and it wouldn’t lift. I applied slightly more pressure. It bent. The base shifted. The curl softened.
And just like that, what should have been a smooth start became a small frustration.
If you’re a lash technician, you’ve lived this moment.
It doesn’t matter if you’re a beginner or an experienced artist working on high-volume sets. Removing lashes from a tray seems simple — until it isn’t.
Why This Matters More Than Most Realize
Improper removal doesn’t just waste a single lash. Over time, it affects:
- Curl retention
- Base integrity
- Volume fan stability
- Adhesive bonding performance
- Application speed
A distorted base can compromise retention. A softened curl affects the finished look. A split fan slows your workflow. Small technical errors compound across an entire set.
What I’m Going to Show You
In this guide, I’ll walk you through exactly how to remove lashes from a lash extension tray without damaging the curl — whether you’re working with classic trays, mixed lengths, or pre-made volume fans.
I’ll share not just the technique, but the reasoning behind it — the engineering, the environmental factors, and the tray quality variables that most technicians overlook.
Because once you understand the “why,” the “how” becomes effortless.
Understanding How Lash Extension Trays Are Designed
Before we talk technique, we need to talk structure.
When I began analyzing why some trays released beautifully while others felt stubborn, I realized the answer wasn’t just in my hands — it was in the tray itself.
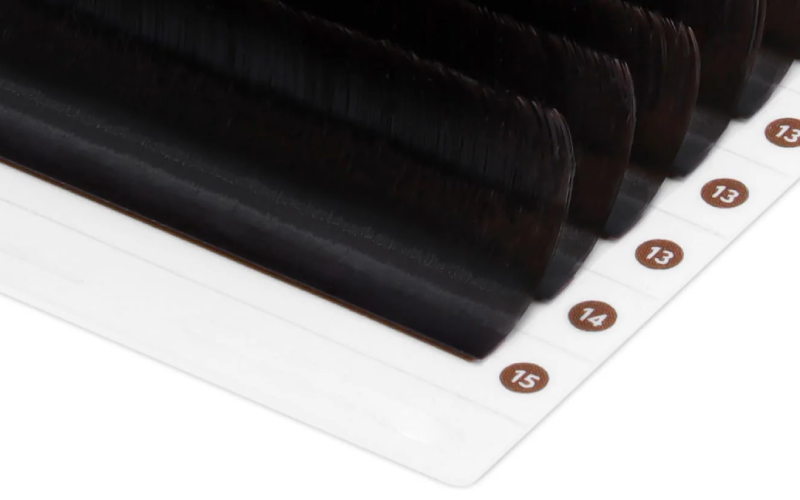
1. Basic Structure of a Lash Tray
Every professional lash tray has three key structural elements:
- Lash fibers aligned on adhesive tape strips
- Tape strips mounted on foil or backing card
- A calibrated adhesive layer that balances holding strength and release control
The adhesive must be strong enough to keep fibers aligned during shipping and storage. At the same time, it must release cleanly during pickup.
That balance is everything.
Here’s how each component affects removal:
| Component | Function | Influence on Removal |
|---|---|---|
| Adhesive Strip | Secures lash bases | Too strong = distortion risk |
| Backing Material | Structural support | Warping changes lift angle |
| Root Alignment | Even spacing | Determines grip precision |
| Adhesive Coating Consistency | Base cleanliness | Impacts residue formation |
When these elements are engineered correctly, removal feels controlled and predictable.
2. Why Removal Sometimes Feels Difficult
If lashes feel “too stuck,” it’s rarely random.
From my experience, the most common causes are:
- Humidity below 40%
- Cold studio temperature
- High-viscosity adhesive coating
- Flexible or low-quality backing material
- Inconsistent adhesive application during manufacturing
I’ve noticed that on dry winter days, even premium trays can feel slightly firmer. The adhesive temporarily grips tighter in low humidity.
This is why understanding environmental influence is just as important as mastering technique.
And now, let’s talk about preparation — because tools can either protect your tray or sabotage it.
Preparation: Use the Right Tools
One of the biggest misconceptions in our industry is that all tweezers perform equally.
They don’t.
1. Why Tools Matter
I’ve tested dozens of tweezers over the years. Even the smallest misalignment in closure can split a volume base instantly.
When removing lashes from a strip, precision matters at the micro level. A poorly aligned tip exerts uneven pressure, and that uneven pressure damages structure.
2. Recommended Tweezers
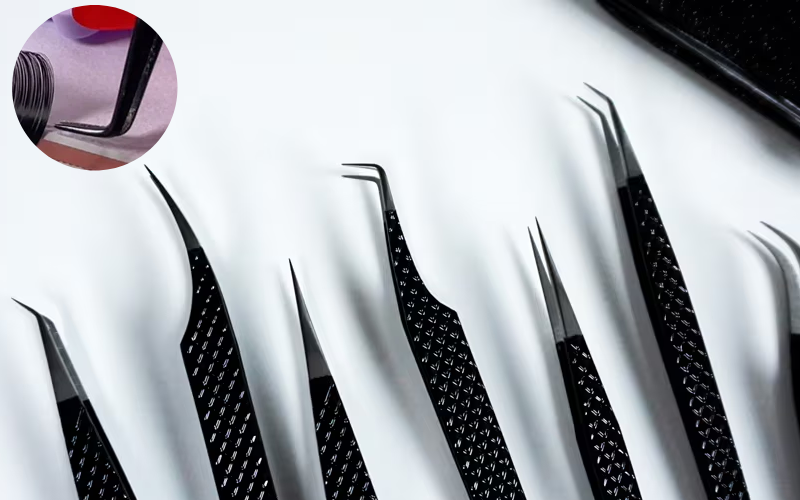
For optimal pickup, I personally rotate between:
- High-precision isolation tweezers
- Curved pickup tweezers for classics
- Boot tweezers for volume fans
- Fine-tip tweezers with perfect closure alignment
Boot tweezers are particularly effective for pre-made fans because they support the entire bonded base evenly, reducing splitting risk.
3. Tools to Avoid
Avoid using:
- Blunt-tip tweezers
- Chipped or worn edges
- Glue-contaminated tips
- Heavy tweezers that reduce hand control
Even a tiny dried adhesive particle can interfere with pickup.
4. Optional Tool: Lash Remover
In rare cases, you may encounter adhesive residue on lower-quality trays. A gentle lash remover can help.
However, in my professional experience, high-quality trays should not require chemical assistance for proper pickup.
Step-by-Step Guide: How to Remove Lashes Properly

Now we move into the heart of the process.
This is the exact method I use daily.
Step 1: Gentle Separation
Before gripping, I lightly tap or isolate the selected lash at its base.
Why?
Because adjacent fibers can subtly overlap. If you grip without confirming separation, you risk pulling neighboring lashes and distorting alignment.
This step takes seconds but prevents base stretching.
Step 2: Find the Correct Grip Point
This is the most critical moment.
I grip 1–2 mm above the adhesive strip, directly at the base.
Never mid-length. Never at the tip.
When I first started lashing, I didn’t think this mattered. But mid-length gripping distributes tension across the curl, flattening it slightly during lift.
For volume fans, I grip only at the bonded base. That tiny bonded point is the structural anchor of the entire fan.
Protect it.
Step 3: Lift Vertically, Not Outward
This is where many technicians unintentionally damage curl memory.
Instead of pulling outward at an angle, I lift straight up — approximately 90 degrees relative to the strip surface.
The motion is slow and controlled.
Vertical lifting preserves:
- Curl integrity
- Base tightness
- Fan symmetry
- Fiber memory
Outward pulling stretches the fiber subtly. You may not see the distortion immediately — but under magnification, the difference is visible.
Step 4: Inspect the Base
Before dipping into adhesive, I pause.
I check:
- Is there visible white residue?
- Is the base tight and aligned?
- Is any tape fragment attached?
This two-second inspection prevents retention issues later.
Professional work lives in small details.
Troubleshooting: Common Problems & Solutions
Even with proper technique, issues can occur.
Let’s address them clearly.
Problem 1: Lashes Feel Too Stuck
In my experience, this is usually environmental.
Possible causes:
- Humidity below 40%
- High-viscosity adhesive strips
- Lower-grade manufacturing
Solutions:
- Increase ambient humidity slightly
- Gently warm the strip with your breath
- Switch to trays engineered for balanced release
Problem 2: Volume Fan Base Splits
This almost always traces back to grip.
Causes:
- Gripping mid-length
- Pulling outward
- Excessive force
Solution:
- Grip only at bonded base
- Use boot tweezers
- Lift vertically with steady pressure
Problem 3: Glue Residue at Base
This indicates inconsistent adhesive coating.
Here’s a quick diagnostic overview:
| Issue | Likely Cause | Professional Fix |
|---|---|---|
| Lash bends | Outward pulling | Lift vertically |
| Fan splits | Incorrect grip | Grip bonded base |
| White residue | Uneven adhesive coating | Gentle strip rub |
| Strip lifting | Weak backing material | Use foil-backed tray |
If residue persists frequently, it may be time to evaluate tray quality.
Signs of a High-Quality Lash Extension Tray
After years of testing trays, I’ve learned that you can identify quality within minutes.
A professional lash tray should:
- Release lashes smoothly
- Leave no adhesive residue
- Maintain consistent curl after removal
- Keep fan bases intact
- Use foil backing to prevent strip warping
- Offer precise, uniform root alignment
When a tray is engineered correctly, pickup feels effortless. There’s no tugging, no distortion, no hesitation.
It feels controlled.
Why Tray Quality Determines Removal Ease
This is where technique meets manufacturing.
1. Adhesive Viscosity Balance
The adhesive must secure lashes during transport but release cleanly during pickup.
Too weak — lashes shift.
Too strong — distortion occurs.
Balance is precision engineering.
2. Root Alignment Precision
Uniform spacing:
- Speeds up pickup
- Reduces wrist fatigue
- Improves set symmetry
When roots are misaligned, your hand compensates — and that increases strain over time.
3. Backing Material Stability
Foil backing maintains flat structural integrity. Paper backing can flex, altering lift angle and resistance.
4. Fiber Quality
Premium PBT fibers retain curl memory under slight tension. Lower-grade fibers lose shape more easily during removal.
At HeymeBeauty, our lash extension trays are engineered specifically to balance secure hold with smooth release. We focus on adhesive calibration, root alignment precision, foil-backed stability, and premium PBT fiber memory.
Removal should feel effortless — not like a struggle.
FAQ
Why do lashes stick too hard to the strip?
When lashes feel excessively stuck, it’s usually due to low humidity or a higher-viscosity adhesive coating on the strip. Dry environments temporarily increase adhesive grip strength. Slightly increasing room humidity or gently warming the strip can often restore smoother release.
Can I remove the entire lash strip from the tray first?
Yes, many experienced technicians prefer removing the entire strip and placing it on a lash tile for better angle control and workflow efficiency. Just make sure the strip remains flat and secure, as bending or curling can affect pickup precision.
Does humidity affect lash removal?
Absolutely. Humidity plays a subtle but important role in how adhesive behaves. In low humidity conditions, the strip adhesive becomes firmer and grips lashes more tightly. Maintaining balanced room humidity helps ensure smoother, more consistent lash pickup.
Why do pre-made fans fall apart during pickup?
Pre-made fans typically fall apart when gripped incorrectly or pulled outward instead of lifted vertically. The bonded base must be handled carefully. Applying uneven pressure or excessive force can weaken the bond and cause the fan structure to split.
Are foil-backed trays better than paper-backed trays?
In most professional settings, foil-backed trays provide greater structural stability. They resist bending, maintain flatness, and allow more consistent pickup angles. Paper-backed trays may flex slightly, which can increase resistance during lash removal.
How do I know if a lash tray is low quality?
Low-quality trays often show signs such as uneven base thickness, inconsistent curl formation, visible adhesive residue, or irregular root spacing. If lashes frequently bend, split, or leave residue during pickup, manufacturing precision may be lacking.
Can lash trays lose adhesive strength over time?
Yes, adhesive strips can degrade if exposed to excessive heat, cold, or fluctuating humidity levels. Improper storage may weaken holding strength or alter release performance. Always store trays in a stable, dry environment to maintain optimal adhesive balance.
Conclusion
Mastering how to remove lashes from a lash extension tray without damaging the curl comes down to three essential elements:
- Correct vertical technique
- Professional precision tools
- High-quality tray engineering
When these work together, pickup becomes seamless.
From my experience, once technicians refine their grip and switch to well-engineered trays like those from HeymeBeauty, removal stops being frustrating and starts feeling effortless.
And when removal becomes effortless, artistry begins.