

You can make cluster lashes last longer by starting with clean, fully dry natural lashes, using a bond made for your cluster system, applying only the amount the label recommends, pressing the clusters securely into place, and keeping oil and friction away from the bond. For most DIY bond-and-seal systems, a realistic goal is about 3–7 days. Pre-glued clusters and clusters used with standard strip-lash glue are usually designed for shorter wear.
The product instructions always come first. Adhesives differ in tack time, water resistance, removal method, and maximum wear. If a brand says to keep the lashes dry for a set number of hours, follow that timing instead of a general tip you see online.
This guide shows you how to make cluster lashes last longer without using more glue than you need or treating longer wear as the only goal. Comfort, cleanliness, and easy removal matter just as much as retention.
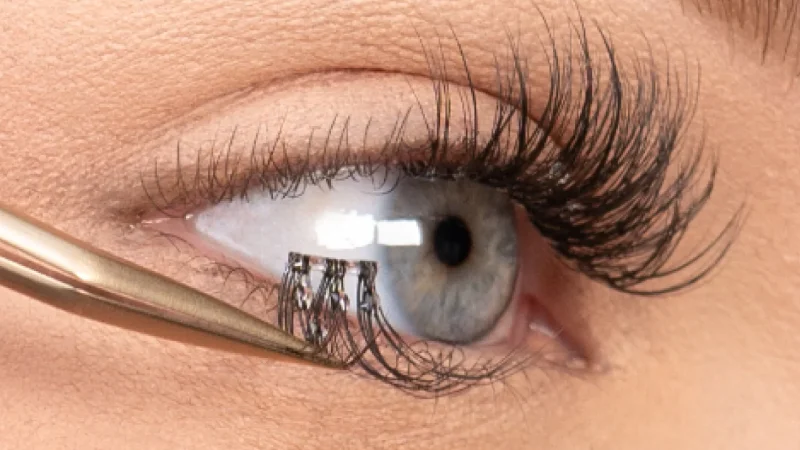
Start With The Right Cluster Lash System
Before you change your technique, check which type of cluster lash you are using. The expected wear time is not the same for every system.
| Cluster Lash System | Typical Wear Goal | What Helps It Last |
|---|---|---|
| Pre-glued or press-on clusters | One day, or the wear period stated on the packaging | Start with clean, dry natural lashes. Press firmly into place and avoid repositioning the clusters repeatedly. |
| Clusters with standard strip-lash glue | Same-day wear | Apply a thin line of glue, wait for the correct tack time, and handle the clusters gently during application. |
| DIY clusters with bond and seal | Approximately 3–7 days for many systems | Clean the natural lashes thoroughly, apply a thin layer of bond, fuse the clusters securely, apply seal, and follow the recommended aftercare. |
| Professional individual lash extensions | Several weeks with regular fills | Have them applied by a trained lash professional and follow extension-specific cleans |
Do not use professional lash-extension adhesive for a DIY cluster application. It cures differently, is made for trained use, and is not a shortcut to safer or better retention. If you are unsure which adhesive matches your lashes, read Can You Use Lash Extension Glue for Cluster Lashes? before you apply them.
Prepare Your Natural Lashes For A Stronger Bond
Most early lifting starts before the first cluster goes on. Makeup, skincare, oil, moisture, and lint can all sit between the adhesive and your natural lashes.
Remove Makeup And Oil
Wash your hands first. Then remove mascara, eyeliner, eye cream, sunscreen, and cleanser residue from the eye area. Use an oil-free cleanser that is suitable for the eyes and for your lash system. Pay attention to the roots of your natural lashes, where bond needs a clean surface.
Do not apply clusters over mascara. Even a light leftover coat can stop the bond from gripping the natural lash evenly.
Let Your Lashes Dry Completely
Pat the area gently and allow your lashes to air-dry. Moisture trapped at the roots can dilute some adhesives or delay their set. Brush the lashes with a clean, dry spoolie so they are separated and easy to map.
Check Your Products And Tools
Use clean tools and check that the bond, seal, and remover are within their stated shelf life. If the adhesive has changed texture, separated, developed an unusual smell, or no longer performs as the label describes, replace it.
Keep your cluster tray, applicator, spoolie, bond, seal, and remover within reach. A smooth setup helps you place each cluster before the bond passes its best tack stage.
Apply Cluster Lashes For Better Retention
If you are new to cluster placement, review this DIY lash application guide before you begin. Then use the steps below to focus on retention.
1.Plan Your Lash Map Before You Apply Bond
Choose the lengths and positions first. Lighter, shorter clusters are often easier to secure than a very long or heavy set. Place the tray in order so you do not need to search for the next piece while the bond is getting tacky.
2. Apply A Thin, Even Layer Of Bond
Follow the adhesive label. In many bond-and-seal systems, you apply a light coat near the base of the natural lashes instead of brushing bond from root to tip. Too much bond can stay sticky, collect debris, clump the lashes, and make removal harder. Too little may leave gaps in contact.
If your system tells you to add a small amount to the cluster base, use only the amount stated in the directions. More glue does not automatically mean longer wear.
3. Wait For The Correct Tack Time
Fresh, wet adhesive can make a cluster slide. Over-dry adhesive may not grip well. Let the bond become tacky for the exact time given by the manufacturer. Temperature and humidity can change how quickly this happens, so watch the texture as well as the clock.
4.Place Each Cluster Close To The Lash Root
Attach the cluster to the natural lashes, not to the eyelid skin or waterline. Keep it close enough to look seamless, but leave enough space to avoid poking or pinching. If a cluster touches skin, feels sharp, or causes discomfort, remove it with the recommended remover and place a fresh, clean cluster again.
5.Keep The Base Straight And Fully Supported
The whole base should make even contact with your natural lashes. A twisted base or a loose corner creates a lifting point. Use smaller clusters around the inner and outer corners if wide pieces do not match your eye shape.
6.Fuse The Clusters Gently
Once the pieces are in position, use a clean, non-stick applicator to press the cluster bases and natural lashes together. Apply steady pressure at the base without pinching the eyelid. Fusing removes small gaps and improves contact across the band.
Wipe the applicator between presses if it picks up adhesive. A sticky tool can pull a cluster out of place.
7.Apply Seal Only As Directed
Seal helps reduce tackiness and can protect the bonded area from oil and moisture. Use a light coat where the bond sits. Flooding the lashes with seal can leave them stiff or clumpy.
Some systems use seal once; others allow later touch-ups. Follow the instructions for your exact product. You can compare common product features in this guide to cluster lash glue.
8.Respect The Initial Set Time
Avoid water, steam, sweat, eye makeup, and rubbing for the period stated on the adhesive label. Online advice ranges from a few hours to 24 hours because formulas are different. The correct waiting time is the one validated for your product.
Follow A Simple Daily Aftercare Routine
Good aftercare protects the bond and keeps the lash line comfortable. The goal is not to avoid cleaning. It is to clean without soaking, rubbing, or leaving oil at the base.
Keep Oil Away From The Bond
Oil-based cleansing balms, eye makeup removers, creams, serums, and some sunscreens can weaken many lash bonds. Check ingredient lists and keep oily products away from the lash line. Wash your hands after applying hair oil or rich skincare before you touch your lashes.
Clean The Lash Line Gently
Follow the cleanser and timing instructions supplied with your lash system. Use an oil-free, eye-safe cleanser and light motions. Do not scrub back and forth. Rinse gently, pat the surrounding skin, and let the lashes dry before brushing.
If your brand does not explain how to clean the set, ask for guidance. Cleanliness should never be traded for a longer wear claim.
Brush Only When The Lashes Are Dry
Use a clean spoolie to separate the tips and restore the shape. Support the lashes lightly and brush from the middle toward the ends. Avoid dragging the spoolie through the bonded bases.
Reduce Friction While You Sleep
Sleeping face-down can press the outer corners into the pillow. Try sleeping on your back or use a smooth pillowcase if that is comfortable for you. Do not wear a tight sleep mask that rubs the lash line.
Be Careful With Heat, Steam, And Water
After the initial set period, many bond-and-seal clusters can handle normal face washing and brief showers. Direct shower pressure, long hot showers, saunas, swimming, and heavy sweating may still shorten wear. Pat or air-dry the lashes instead of rubbing them with a towel.
Skip Mascara And Heavy Eye
Cluster lashes already provide length and volume. Mascara can create buildup and make the set harder to clean. Waterproof eye makeup often needs stronger rubbing or oily remover, so it is a poor match for multi-day cluster wear.
Do Not Pick At A Lifting Cluster
Picking transfers oil from your fingers and pulls on the natural lashes. If a corner lifts, follow the product’s touch-up instructions. If the cluster is dirty, twisted, uncomfortable, or widely detached, remove it properly instead of adding more bond over buildup.
Troubleshoot Cluster Lashes That Fall Off Early
Use the pattern of failure to find the likely cause.
| Problem | Likely Cause | What to Change Next Time |
|---|---|---|
| Clusters fall off the same day | Oil or makeup residue, an incompatible adhesive, or bond applied at the wrong tack stage | Clean and dry the natural lashes thoroughly, use products from the matched system, and follow the recommended tack time. |
| Inner or outer corners lift first | The cluster is too wide, the base is twisted, or blinking and sleeping create excess friction | Choose a narrower cluster, make sure the full base is properly supported, and minimize friction around the corners. |
| Lashes stay sticky | Too much bond, too little seal, or incorrect use of the seal | Apply a thinner layer of bond and follow the seal instructions carefully. |
| The set looks clumpy or heavy | Excess adhesive or clusters that are too dense for the natural lashes | Use less adhesive and select lighter, less-dense clusters. |
| Lashes loosen after showering | The initial setting time was too short or direct water pressure weakened the bond | Follow the labeled dry-time instructions and keep the shower stream away from the lashes. |
| The lash line looks dirty | Makeup, oil, dust, or adhesive buildup | Clean the lashes according to the product directions. Remove the set if it cannot be cleaned comfortably. |
| Redness, swelling, pain, or strong itching | Possible irritation, allergic reaction, or injury to the eye surface | Stop using the product. Remove the lashes as directed if you can do so safely, and seek medical advice. |
If the same problem happens with several customers or several packs, the issue may be product consistency rather than technique. Record the batch number, climate, application method, and time to failure before you change the formula or instructions.
Remove Cluster Lashes Without Pulling
Longer wear is not a win if removal damages the natural lashes. Use the remover made for your bond-and-seal system and follow its contact time.
- Wash your hands and remove contact lenses if the product directions or your eye-care professional advise it.
- Apply remover to the bonded area without putting it into the eye.
- Wait for the adhesive to soften. Do not rush this step.
- Gently slide the clusters away. If you feel resistance, add more remover and wait again.
- Clean the natural lashes and eyelids to remove adhesive and remover residue.
- Let the eye area recover before you reapply, especially if the skin feels tender.
Never pull, peel, or cut bonded clusters from your natural lashes. See How To Remove Lashes At Home for a fuller removal guide.
Remove the set early if it feels painful, pinches, becomes difficult to clean, has several lifted sections, or causes redness, swelling, discharge, or persistent itching. If adhesive gets into your eye or symptoms are severe, rinse as directed on the label and get prompt medical advice.
How Long Should Cluster Lashes Last?
There is no honest single number for every cluster lash. Wear time depends on the cluster construction, adhesive system, application, skin oil, climate, and daily habits.
For many DIY bond-and-seal kits, 3–7 days is a practical range when the product is designed and labeled for multi-day wear. Pre-glued clusters or clusters applied with standard strip-lash glue may be intended for one day. Read How Long Do Cluster Lashes Last? for a detailed comparison.
Do not keep a set on simply because it is still attached. Follow the maximum wear time on the product, remove lifting or dirty clusters, and put comfort and hygiene ahead of an extra day.
What Lash Brands And Salons Should Test?
If you sell cluster lashes, you influence retention before your customer opens the pack. A clear system usually creates better results than a bold wear-time claim.
Match Every Part Of The Kit
Test the clusters, bond, seal, remover, and applicator together. Band width, band flexibility, fiber weight, bond viscosity, brush shape, and applicator coating can all change how easily a customer gets full contact.
Validate Wear Claims With Real Users
Run wear tests across beginners and experienced users, oily and dry skin types, and different temperature and humidity conditions. Track same-day lift, day-by-day retention, comfort, cleanup, and removal. Use the results to set a realistic claim and explain what can shorten wear.
Put Critical Instructions On The Pack
Your instructions should state:
- Which adhesive and remover to use
- How to prepare the natural lashes
- Where and how much bond to apply
- The tack time and initial water-free period
- How to fuse and seal the clusters
- How to clean the lash line
- The maximum wear time
- When to remove the set and seek help
A QR code can link customers to a short video, troubleshooting page, and updated aftercare guide. Keep the key safety and removal steps on the physical pack in case the customer never scans it.
Keep Batch Performance Consistent
Check cluster base thickness, curl recovery, shedding, adhesive fill weight, viscosity, brush loading, package seal, and remover performance during quality control. If a formula or component changes, repeat the wear test before you reuse the same retention claim.
HeyMe Beauty manufactures private label DIY eyelash extensions, bond-and-seal systems, removers, tools, and custom kits for lash brands, salons, retailers, online sellers, and wholesalers. You can request samples to test the full system before placing a bulk order.
FAQ
How Do You Make Cluster Lashes Last Longer?
Start with clean, dry natural lashes. Use the adhesive designed for your cluster system, wait for the stated tack time, place the clusters close to the lash roots without touching the skin, fuse the bases, and apply seal as directed. Afterward, keep oil and friction away from the bond and clean the lash line gently.
Why Do My Cluster Lashes Fall Off After One Day?
The most common causes are leftover oil or makeup, wet lashes, the wrong glue, an overly wet or dry bond, poor contact at the cluster base, and water or steam before the adhesive has set. Check one variable at a time so you can find the real cause.
Can You Shower With Cluster Lashes?
Follow the water-free period on your adhesive label first. After that, use a brief shower, keep strong water pressure off the eyes, and pat or air-dry the lashes. Long steam exposure may shorten retention.
Can You Sleep In Cluster Lashes?
Only if your cluster system is labeled for multi-day wear. Reduce friction by avoiding face-down sleep and tight sleep masks. Remove the lashes if they pinch, twist, lift, or become uncomfortable.
Should You Add More Glue When A Cluster Lifts?
Do not keep layering bond over oil, makeup, or old adhesive. If the product allows touch-ups and the cluster is clean, you may resecure a small lifted area as directed. Otherwise, remove the piece, clean the area, and replace it.
Can You Use Professional Lash Extension Glue For Cluster Lashes?
Not for a DIY application. Professional extension adhesive is made for trained use and a different application method. Use a consumer cluster bond that is labeled for your lash system.
Can You Reuse Cluster Lashes?
You can reuse them only if the manufacturer says they are reusable and you can remove, clean, dry, and store them without changing the base or fiber shape. Pre-glued clusters may lose tack after removal, so check the product directions.
When Should You Remove Cluster Lashes?
Remove them at the product’s maximum wear time or earlier if they lift, twist, collect buildup, become hard to clean, or cause discomfort. Redness, swelling, pain, discharge, or strong itching are signs to stop use and seek medical advice.
Make Better Retention Easy To Repeat
The best answer to how to make cluster lashes last longer is a repeatable routine: match the lash and adhesive system, prepare the natural lashes, use a controlled amount of bond, fuse the bases, follow the labeled set time, and protect the bond from oil and friction.
If you run a lash brand or salon, turn that routine into clear packaging, a short tutorial, and a tested kit. Your customers should not have to guess how much bond to use, how long to wait, or how to remove the lashes safely. For custom clusters, bond and seal, remover, tools, and packaging, contact HeyMe Beauty to discuss a private label kit built around your market.