![]()
Isolating individual lashes is one of the most crucial skills in lash extension application. Whether you’re a beginner or an experienced lash artist, perfect isolation is the foundation for achieving a flawless, natural look and ensuring that the lash extensions bond securely to each natural lash. Without proper isolation, you risk applying extensions to multiple lashes at once, which can cause clumping, discomfort, and even damage to the natural lashes.
In this blog post, we’ll walk you through the essential steps and techniques to isolate lashes with precision, covering everything from the right tools to the best practices. Mastering the art of isolation will not only help you improve the quality of your work but also speed up your lash application process. Let’s dive into the world of perfect isolation and take your lash extension skills to the next level!
What is Isolation in Lash Extensions
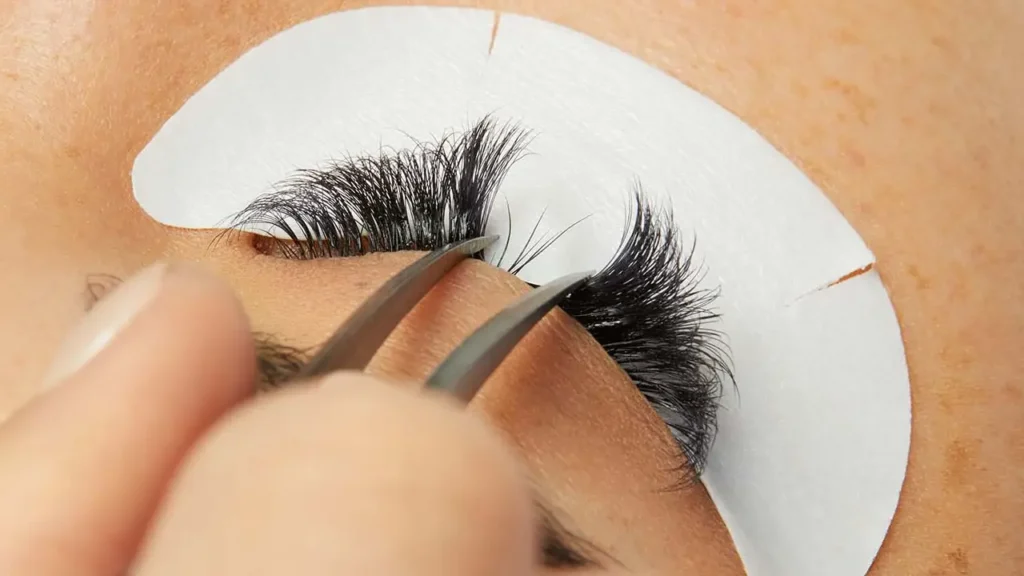
In lash extensions, isolation refers to the crucial step of carefully separating a single natural lash from its neighboring lashes before applying an extension.
Techniques for achieving proper isolation:
- Use specialized isolation tweezers: These tweezers have unique shapes and tips designed to easily separate individual lashes.
- Utilize gentle pressure: Avoid pulling or tugging on the natural lashes, as this can cause damage.
- Practice patience: Take your time and focus on isolating each lash meticulously.
Proper isolation is a fundamental skill for lash extension technicians. It requires practice and precision to master, but it is essential for achieving beautiful, safe, and long-lasting results for clients.
How to Isolate Lash Extensions

Lash isolation is one of the most crucial steps in the lash extension process. It ensures that each natural lash is properly separated and can hold a lash extension without clumping or damaging the surrounding lashes. Proper isolation is the key to achieving a full, natural-looking set of lashes and is essential for long-lasting results. Whether you’re a beginner or an experienced lash artist, understanding and perfecting the isolation technique is vital to mastering the art of lash extensions.
In this guide, we will delve into the steps, techniques, and tips you need to isolate lashes effectively, while also providing insight into common mistakes to avoid. Let’s break it down step by step.
Why Lash Isolation is Important
Before we dive into the how-to, let’s first understand why isolation is so important:
- Prevents Clumping: Proper isolation ensures that each natural lash is separated before an extension is applied. If lashes aren’t isolated, the extensions can stick to multiple lashes, creating clumps that are unsightly and may cause damage over time.
- Prevents Damage: When lashes are isolated correctly, the extension is only applied to a single natural lash, preventing undue stress and pulling on multiple lashes at once. This helps maintain the health and growth of the natural lashes.
- Longer-Lasting Extensions: Proper isolation ensures that each lash extension adheres firmly to its natural lash, allowing it to last longer and stay intact throughout the lash cycle.
- Creates a More Natural Look: The individual placement of extensions on each lash provides a more polished, fuller, and seamless appearance.
Tools You Need for Lash Isolation
Before you begin isolating lashes, ensure you have the proper tools:
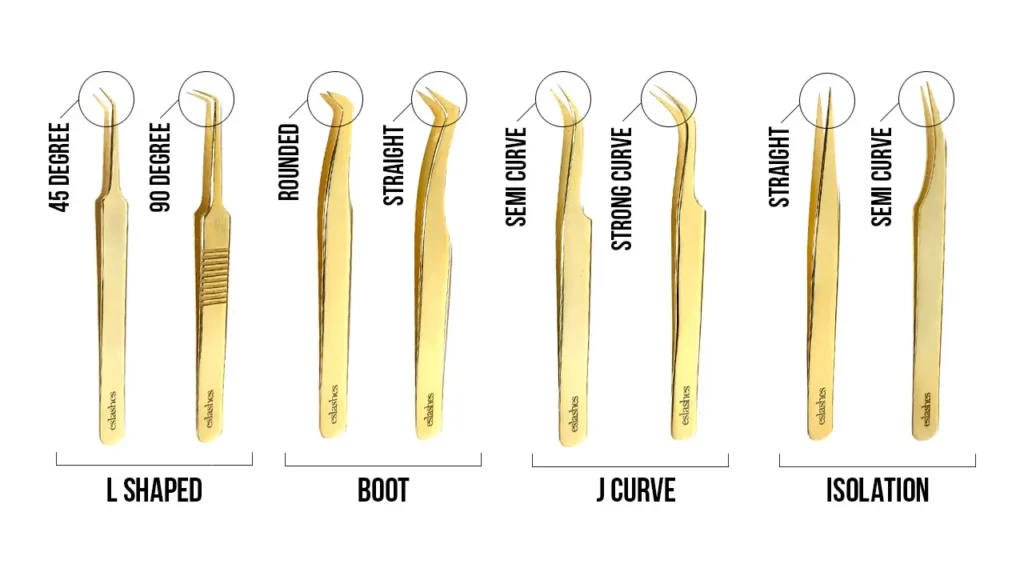
- Lash Extension Tweezers: The most common tweezers used for isolation are straight or curved tweezers. Curved tweezers are particularly useful when working around the natural curve of the eye, while straight tweezers are ideal for separating lashes without interfering with surrounding lashes.
- Micro Brushes or Lash Brushes: These are useful for combing through the lashes to ensure they are free from tangles before you start isolating.
- Lash Gel or Tape: Some lash artists prefer to use tape or gel pads to hold down the lower lashes and prevent them from interfering with the upper lashes.
- Magnifying Mirror or Lamp: Clear visibility is key to successful isolation. Ensure you have a good light source and magnification if needed.
Step-by-Step Guide to Isolating Lashes
Now, let’s break down the step-by-step process of how to isolate lashes effectively:
1. Prep the Client’s Lashes
The first step in any lash application is to prep the natural lashes. This includes cleaning the lashes to remove any oil, dirt, or makeup that could interfere with the adhesive bond. You should also use under-eye gel pads or tape to secure the lower lashes and prevent them from getting in the way.
2. Choose the Right Tweezers
The type of tweezers you choose will affect how easily you can isolate lashes:
- Curved Tweezers: These are often used for isolation, especially in the inner and outer corners of the eyes where the natural lashes may be more difficult to access.
- Straight Tweezers: These work well for isolating lashes in the middle of the eye where the lashes are usually more accessible.
3. Identify the Lash You Want to Isolate
Before you start isolating, take a moment to identify a single natural lash. Your goal is to find a healthy, isolated lash that you can apply an extension to. Look for a natural lash that’s in the growth phase, not one that’s too short or too long, as it may not hold the extension properly.
4. Isolate the Lash Using Your Tweezers
Once you’ve identified a lash, use your tweezers to separate it from the surrounding lashes. This is the trickiest part of the process, as it requires steady hands and careful attention. Here are some tips:
- Use the Right Pressure: When using the tweezers, apply gentle but firm pressure to isolate the lash. Too much pressure can cause the natural lashes to bend or break.
- Position the Tweezers Correctly: For curved tweezers, gently grasp the natural lash near the base with one hand, and use the opposite hand to guide the other lashes out of the way. For straight tweezers, isolate by holding the lash firmly while ensuring surrounding lashes are pushed away from the isolated lash.
- Be Patient: Isolation may take a few attempts, especially when working with finer or more delicate lashes. Don’t rush—ensure each lash is fully separated before applying the extension.
5. Secure the Isolated Lash
Once you have isolated the lash, hold it gently in place with the tweezers. This will allow you to keep it separate from the other lashes while you apply the extension. Make sure to keep a firm grip on the isolated lash to avoid accidentally moving or losing control.
6. Apply the Lash Extension
After the natural lash is fully isolated, you can proceed with picking up the lash extension and applying it. Using your other hand, carefully pick up the extension with your second set of tweezers, dip it in adhesive, and apply it to the isolated natural lash.
7. Check the Isolation After Application
After applying the extension, double-check that the lash is still fully isolated. Sometimes, lashes can shift during the application process. If this happens, isolate again and correct any clumping or bonding issues.
Common Challenges in Lash Isolation
While lash isolation is an essential skill, it can be tricky, especially for beginners. Here are some common challenges you may face and how to overcome them:
- Lashes Clumping Together: If the natural lashes are sticking together, try combing through them with a micro-brush or lash wand before isolating. Also, ensure you’re using the right amount of adhesive—too much adhesive can cause clumping.
- Difficult Angles: The inner and outer corners of the eye can be tricky to access. For these areas, you might need to adjust the angle at which you hold your tweezers. Curved tweezers are ideal for these hard-to-reach places.
- Not Holding the Lash Firmly Enough: If the lash isn’t held firmly during isolation, it can slip or move during the application. Practice using a gentle but firm grip and make sure your hand is steady.
Lash Extension Isolation Tips
- Use a Steady Hand: Avoid shaky hands by keeping your wrist and hand as stable as possible. Relax your muscles to reduce tension.
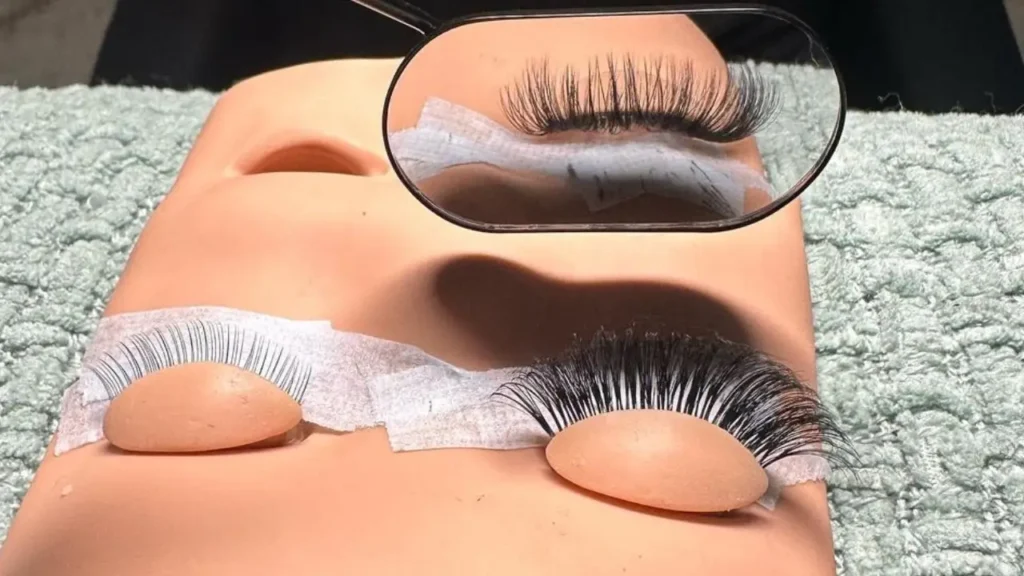
- Practice Makes Perfect: The more you practice isolating lashes, the more efficient and accurate you’ll become. Spend time on a mannequin head or during training to get a feel for the right techniques.
- Consider the Lash Direction: Be aware of the direction of natural lash growth and ensure that you’re isolating them in the right way. This will prevent tangling and ensure a clean application.
- Utilize Different Tweezer Types: Different tweezers work best for different techniques. Invest in both straight and curved tweezers, as each one can help with isolation in different parts of the eye.
Ways to Improve Your Lash Extension Isolation Skills

1. Practice, Practice, Practice!
- Mannequin Heads: This is your best friend! Practice isolating lashes on a mannequin head repeatedly. Focus on precision and speed.
- Lash Pads: These offer a more realistic surface than mannequins.
2. Invest in Quality Tools
- Tweezers: High-quality isolation tweezers with fine, pointed tips are essential. Experiment with different shapes (straight, angled, curved) to find what works best for you.
- Magnifying Lamp: A good magnifying lamp with adjustable brightness will significantly improve your visibility.
3. Master the “Flicking” Motion
- Gently “flick” the tweezers along the lash line to separate individual lashes. Avoid pulling or tugging on the natural lashes.
4. Utilize Isolation Aids
- Isolation Wands/Shields: These tools can help you separate and hold back neighboring lashes during application.
5. Maintain a Clean Workspace
- A clutter-free workspace allows for better focus and efficiency. Keep your tools organized and within easy reach.
6. Good Posture and Ergonomics
- Maintain good posture to prevent strain and discomfort during long sessions.
7. Continuous Learning
- Attend workshops or online courses to learn advanced isolation techniques and stay updated on the latest industry trends.
8. Observe Experienced Lash Artists
- Watch how experienced lash artists isolate lashes. Pay attention to their techniques and try to incorporate them into your own practice.
9. Seek Feedback
- Ask a mentor or experienced lash artist to observe your work and provide constructive feedback on your isolation technique.
10. Patience and Persistence
- Isolation takes time and practice to master. Don’t get discouraged if you don’t get it right away. Keep practicing, and you will gradually improve.
By consistently practicing these tips and refining your technique, you can significantly improve your lash extension isolation skills, leading to more beautiful, long-lasting, and safe results for your clients.
Lash Extension Isolation Tweezers

Lash extension isolation tweezers are specialized tools designed to help lash technicians accurately separate individual natural lashes from the rest of the lash line.
Key Features:
- Precision Tips: They typically have very fine, pointed tips that allow for precise gripping and manipulation of individual lashes.
- Unique Shapes: Some tweezers have specific curves or angles in their tips to better navigate the delicate area around the eyes.
- Comfortable Grip: Many are designed with ergonomic handles for comfortable and controlled use during extended periods.
Why Are Lash Extension Isolation Tweezers Important
- Accurate Isolation: Proper isolation is crucial for successful lash extensions. It prevents clumping, ensures even adhesion, and minimizes the risk of damaging natural lashes.
- Improved Efficiency: The right tweezers can significantly speed up the isolation process, making lash application more efficient.
- Reduced Risk of Infection: By minimizing contact with surrounding lashes and skin, they help reduce the risk of adhesive transfer and potential eye irritation.
Types of Isolation Tweezers:
- Straight: These are the most common type, offering good control and precision.
- Angled: The tips are angled, which can be helpful for reaching certain areas around the eyes.
- Curved: The tips have a slight curve, which can be beneficial for isolating lashes in the inner or outer corners of the eyes.
Choosing the Right Tweezers:
- Consider your experience level: Beginners might find straight tweezers easier to use.
- Experiment with different shapes: Try out different types to see which ones feel most comfortable and give you the best control.
- Invest in quality: High-quality tweezers are more durable and will provide better performance in the long run.
Proper Use and Maintenance:
- Clean and disinfect: Always clean and disinfect your tweezers after each use to maintain hygiene and prevent the spread of bacteria.10
- Handle with care: Avoid dropping or mishandling your tweezers, as this can damage the tips.
By using the right isolation tweezers and mastering the technique of isolating individual lashes, lash technicians can achieve beautiful, long-lasting, and safe lash extension results for their clients.11
Conclusion:
In conclusion, mastering the technique of lash isolation is the foundation of any successful lash extension application. Whether you’re a beginner or an experienced lash artist, isolating each natural lash properly ensures that the extensions are applied securely and without damaging the client’s natural lashes. By practicing the right hand positioning, using the correct tweezers, and maintaining a steady hand, you’ll be able to achieve precise isolation every time. Remember, patience and consistent practice are key to perfecting this skill.
Ready to take your lash business to the next level? Get high-quality lash extensions at unbeatable wholesale prices today! Contact us now and stock up on premium lash products that will help you create stunning sets for your clients. Don’t miss out on the best deals—order now!
