![]()
Cleaning your tweezers for eyelash extensions is essential for maintaining hygiene and precision. Proper cleaning prevents bacteria buildup and keeps your tools in optimal condition. In this guide, you’ll learn how to clean tweezers for eyelash extensions to ensure your tweezers stay spotless and ready for your next application.
Ready to level up your tools? Quote eyelash extension tweezers and tweezer cleanser from Heyme Beauty today!
What Are Eyelash Tweezers?
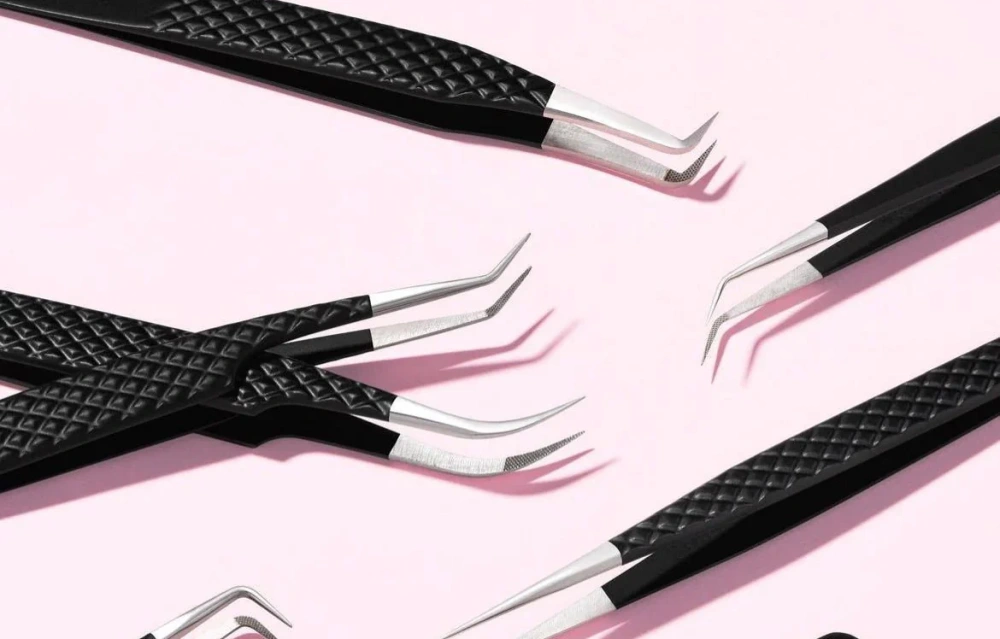
Eyelash tweezers are precision tools designed for applying eyelash extensions. They help you pick up and place lashes accurately, ensuring a flawless look. Available in different shapes and sizes, each type serves a unique purpose, from isolating natural lashes to picking up extensions. Keep your application process smooth and precise with the right tweezers.
Why Should You Clean Your Tweezers?
Health Concerns
You need to clean your tweezers to avoid transferring bacteria or viruses. Unclean tools can harbor germs, leading to infections. By sanitizing them, you reduce the risk of exposing yourself or your clients to harmful microorganisms. Keeping your tools hygienic is crucial for maintaining a safe and clean environment for eyelash extensions.
Good for Business
Dirty tweezers can negatively impact your business reputation. They can cause germs to spread between clients, increasing the chance of infections. Clean tools help ensure a safe, professional service and avoid unnecessary risks. Sanitizing your tweezers shows clients you take their health seriously and care about providing quality service.
Reputation
Your reputation is everything. Failing to clean your tweezers can lead to serious consequences, including liability for spreading infections. By keeping your tools sanitized, you protect your business and maintain trust with your clients. Clients expect a safe and hygienic service, so always prioritize cleaning your tweezers to safeguard your name.
Best Way to Clean Tweezers
Cleaning with Soap and Water
Cleaning your tweezers, start by rinsing them under warm water. Apply a small amount of mild soap or dish detergent to a soft cloth. Gently scrub the tweezers to remove dirt or residue. Rinse well with water, ensuring no soap remains. Dry the tweezers thoroughly with a clean towel to avoid rust or water spots.
Sanitize with Rubbing Alcohol
For sanitizing, soak a cotton pad or swab in rubbing alcohol. Wipe down the entire tweezer, ensuring you clean both the tips and handle. The alcohol will help remove oils, makeup, or residue. Let the tweezers air dry completely before use. This method keeps your tweezers free from bacteria or germs, making them safe for lash application.
Disinfect Lash Tweezers
Disinfecting lash tweezers, use a disinfectant spray designed for beauty tools. Hold the tweezers and spray the disinfectant onto the tips. Let it sit for a few seconds, allowing the solution to kill any bacteria or pathogens. Wipe the tweezers with a clean cloth, ensuring they are dry and ready for use. This keeps your tweezers safe and sanitized for every application.
How to Clean Tweezers: Step by Step Guide
As a lash artist, it’s essential to properly sterilize all eyelash tools between clients. Follow this step-by-step guide to effectively clean your lash tweezers:
Step 1: Scrape off Glue Remnants
Gently scrape off any lash glue residue using a soft material. Do not use metal tools, as they can scratch or damage the fine tips of your tweezers. Ensure that no glue is left behind, as it could affect the precision of your work.
Step 2: Wash with Soap and Water
After each use, rinse the tweezers under running water with a mild soap. Use your hands to gently scrub away any remaining dirt or oils. This step helps to remove any adhesive or makeup residue before further sterilization.
Step 3: Prepare for Barbicide Soak
Place a small cotton pad at the bottom of your barbicide jar. This will protect the delicate ends of your tweezers from direct contact with the jar. Submerge your tweezers in barbicide for at least 30 minutes for proper sanitation.
Step 4: Rinse and Dry
After the tweezers have soaked in barbicide, rinse them thoroughly with clean water from the tap. Make sure there is no excess solution left on the tool, then place them on a clean towel to air dry.
Step 5: Sterilize Using Autoclave or UV Sanitizer
For full sterilization, use either an autoclave or a UV sanitizer. An autoclave uses heat and pressure to kill bacteria, while a UV sanitizer uses ultraviolet light to disinfect. Both methods ensure your tweezers are completely free of germs.
Step 6: Ready for Use
Once sterilized and dried, your tweezers are ready to use again for your next client. Ensure they are completely dry before storing them in a clean, safe place to prevent contamination.
Tips For Good Tweezer Hygiene
Using single-use tools, sterilizing equipment between clients, or a combination of both is essential in preventing cross-contamination. Lash artists should have multiple pairs of each type of tweezers: isolating, classic pick-up, and volume. For every client, ensure you use either new or properly disinfected tweezers, in compliance with the Beauty Hygiene and Health & Safety Law.
Before sterilizing tweezers, any lash adhesive or glue residue must be removed. Many lash technicians unintentionally damage their tweezers by attempting to scrape off glue with other tweezers.
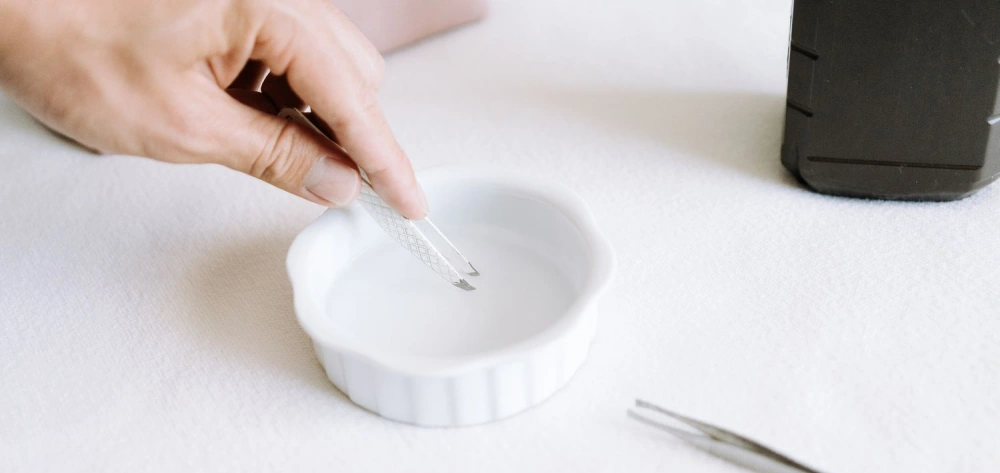
Here’s a simple method to remove the residue without causing harm to your tools:
- Place the tweezers in a bowl.
- Boil water and pour it over the tweezers.
- Let them sit in the boiling water for 1–2 minutes.
- Remove them from the bowl.
- Use two sponges or lip applicators to gently press on the glue-covered area, removing the residue.
Once the glue is removed, follow the cleaning steps outlined above to fully sanitize your tweezers.
Your tweezers are one of the most important tools in your kit, but they can get quite dirty. It’s essential to not only clean and sanitize them but also store them properly.
Sanitizing is just the start. To maintain cleanliness, store your tweezers in a clean, airtight container. Our tweezer stand with a cover is perfect for keeping them safe and secure, preventing them from falling off your station or trolley. The lid ensures they stay free from dust. Avoid sharing tweezers and dispose of any that are old or damaged. If you’re unsure about proper maintenance, consult a professional for guidance.
Tips For Taking Care Of Your Eyelash Tweezers
Investing in high-quality tools is the first step to becoming a professional lash artist, and eyelash extension tweezers are some of the most essential tools you can own. Treat them as an investment and maintain them regularly to extend their lifespan. Keeping your tweezers in top condition is in your best interest.
Dropping your favorite tweezers, especially volume lash tweezers, or accidentally hitting their tips on your lash tile can ruin your precision. If not properly cared for, the delicate stainless-steel tips will bend or become damaged.
Invest in a secure storage container for your tweezers. When not in use, store them safely to avoid any damage. Choose a container that doesn’t close too tightly, as this can bend the tips.
Having more than one set of tweezers is a must. Keeping a spare, sanitized set on hand helps prevent any disruptions during your work.
Conclusion
In conclusion, learning how to clean tweezers for eyelash extensions is crucial for maintaining both hygiene and the longevity of your tools. Regular cleaning and proper storage will ensure your tweezers stay in excellent condition and deliver precise results every time.
Ready to elevate your lash game? Quote your eyelash extension tweezers and tweezer cleanser today from Heyme Beauty to keep your tools spotless and performing at their best.
FAQ
How to clean lash glue off tweezers
Removing any excess lash glue from the tweezers with a soft cloth or cotton pad. This will help you get rid of most of the adhesive. If there is still glue left, soak the tweezers in warm water for a few minutes. This will loosen any remaining glue. After soaking, gently wipe the tweezers with a non-abrasive sponge to remove the rest of the residue.
Once the glue is gone, rinse the tweezers under clean water to remove any remaining water or soap. Be sure to dry them thoroughly with a clean towel or cloth. Leaving them wet can cause rust or damage. Store the tweezers in a safe, dry place to maintain their condition.
To ensure your tweezers last longer, make cleaning a regular habit after each use. This will prevent any build-up of glue or other materials that could affect the performance of your tweezers over time.
How to clean tweezers with barbicide?
Wiping off any dirt or glue from the tweezers using a soft cloth or cotton pad. This will remove the majority of the residue before disinfecting. Place the tweezers in a clean Barbicide solution and let them soak for at least 10 minutes. This will help eliminate germs and bacteria from the tools.
After soaking, remove the tweezers and rinse them under clean, running water to remove any Barbicide solution. It’s essential to ensure there is no leftover solution on the tweezers. Dry the tweezers with a clean towel or let them air dry completely before storing.
To maintain hygiene, clean your tweezers with Barbicide after every use. Regular disinfecting helps keep your tools safe for your clients and ensures optimal performance each time.
How to clean tweezers without alcohol?
Cleaning tweezers without alcohol, start by washing them with warm, soapy water. Use a small brush or cloth to scrub off any dirt, oil, or residue. Make sure you clean all the surfaces, especially the tips, to ensure there is no debris left on the tweezers. Rinse them under clean water to remove the soap.
After rinsing, dry the tweezers with a clean towel or cloth. Ensure they are fully dry to prevent rust or damage. You can also let them air dry if you prefer.
For extra sanitization, you can use alternatives like vinegar or hydrogen peroxide. Soak the tweezers in one of these solutions for a few minutes, then rinse and dry them thoroughly. These disinfectants will help keep your tweezers germ-free without the need for alcohol.
How to clean tweezers after tick removal?
Using tweezers to remove a tick, immediately wipe off any visible dirt or debris. Use a clean cloth or tissue to remove as much of the tick residue as possible. This helps prevent the spread of bacteria and ensures the tweezers are clean for the next use.
To disinfect the tweezers, heat a small amount of water to boiling. Carefully place the tweezers in the hot water for 1-2 minutes. This helps kill any germs or bacteria left on the tweezers after use. If you prefer, you can use rubbing alcohol to disinfect the tweezers instead of boiling water.
After disinfecting, dry the tweezers with a clean towel or cloth. Ensure they are fully dry before storing them. Keep the tweezers in a clean, safe place to maintain their condition and avoid contamination.
How to clean tweezers and nail clippers?
Soaking both the tweezers and nail clippers in warm, soapy water for a few minutes. This helps loosen dirt, oils, or any residues. After soaking, use a small brush or cloth to scrub the tools, paying special attention to the tips and edges. Make sure to remove all dirt and residue from the tools.
Rinsing the tools under running water to remove any soap. After rinsing, dry the tweezers and nail clippers with a clean towel or cloth. Be sure they are completely dry to avoid rust or corrosion, especially if the tools are metal.
For extra sanitization, you can wipe the tools with rubbing alcohol or use an alternative disinfectant. This will ensure that both your tweezers and nail clippers are free of germs and safe to use.