![]()
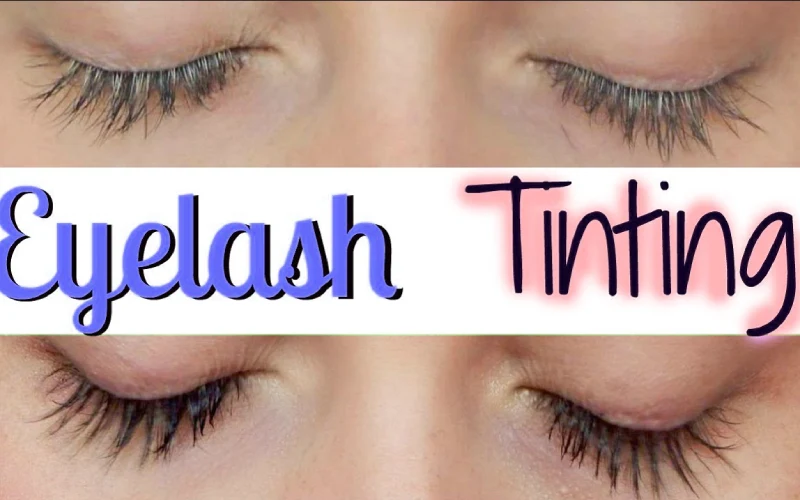
When you hear “eyelash tint,” you might imagine mascara, but it’s far more potent. Eyelash tinting is a semi-permanent dyeing process that darkens your natural lashes by depositing pigment into the hair shaft, not just coating the surface. According to cosmetic-industry guides, tint formulas usually consist of a dye component plus a developer — often mild hydrogen peroxide — to lift the lash cuticle gently so the pigment penetrates.
As a manufacturer deeply experienced in eyelash tint products, we develop formulas that balance performance and safety. Our tints are crafted with professional-grade dyes and carefully measured developer strength to ensure a smooth, even result without damaging lash fibers.
Also, because of how near the eyes this is being applied, regulations and safety standards are significant. For example, in the U.S., products containing silver nitrate for eyelash and brow tinting must adhere to FDA limits.
Why Tint Your Eyelashes at Home?
Let me share a little behind-the-scenes insight: we manufacture eyelash tint not only for salons, but also for at-home users — because there’s a growing demand for DIY solutions that deliver professional quality. Doing your tint at home offers several real, practical benefits:
- Cost Efficiency: A quality tint kit from a reliable manufacturer like us can last for many applications, far reducing the cost per use compared to going to a salon every month.
- Convenience: You can do it in your own time, on your own schedule — no appointment, no travel.
- Customization: We offer different shades (soft brown, natural black, intense black) and developers, so users can tailor the depth and tone to their preference.
- Control & Safety: Because we know professional expectations, we design our kits with safety in mind: precise dye-to-developer ratios, high-viscosity formulas, and detailed instructions to minimize risk.
From feedback we get from wholesalers and end-users, many appreciate how our tint feels less “harsh” than drugstore dyes — while still delivering a rich, long-lasting result.
Important Safety Considerations (Our Expertise + Industry Standards)
We can’t stress this enough: safety is paramount when tinting eyelashes, especially at home.
- Regulatory Compliance
Per the California Board of Barbering & Cosmetology, only certain tint additives — like silver nitrate — are FDA-compliant for eyelash use, and they come with strict restrictions (e.g., maximum 4% by weight, limited application time). - Patch Test Is Non-Negotiable
Even with our carefully formulated product, perform a patch test at least 24 hours before your full application. Put a tiny mixed drop behind your ear or on your inner arm, and monitor for redness or irritation. This step is often recommended by estheticians and makeup professionals. - Hygiene Matters
Use clean tools every time. Don’t reuse applicators — contamination can cause infections. The UK’s Trading Standards warned that at-home lash lift/tint kits can carry serious risk if not applied under strict hygiene. - Correct Storage & Disposal
Store your tint kit in a cool place, out of sunlight, and away from food. According to MSDS (Material Safety Data Sheet) for typical eyelash tint, small spills should be diluted with water; large ones should be absorbed into inert material (e.g., vermiculite) and disposed of per local regulations. - Eye Protection & Application Technique
- Put a barrier of petroleum jelly or a thick cream on the skin around your lash line to prevent staining.
- Use protective pads or shields under the lower lashes.
- Keep your eyes closed (or very still) while applying dye.
- Use a timer: 5–10 minutes is typical, depending on shade intensity.
- Rinse gently with water, making sure no dye gets into your eyes. If irritation or burning occurs, rinse immediately and stop.
Step-by-Step Guide: How to Tint Your Lashes at Home
Here’s a detailed, experience-tested procedure — from us, as a manufacturer who’s supplied professional salons and DIY users alike.
- Gather Your Supplies
- Your eyelash tint dye and developer
- A mixing dish (non-metal)
- A small applicator brush or disposable spoolie
- Petroleum jelly or barrier cream
- Under-eye pads or cotton rounds
- Timer
- Cleanser (gentle, oil-free)
- Water and cotton swabs for cleanup
- Cleanse Your Lashes
Begin by washing your face thoroughly and ensuring your lashes are free from makeup, oil, or residue. Use a gentle, non-oily cleanser. This ensures the dye can adhere well and process evenly. - Protect the Skin Around Your Eyes
Apply a layer of petroleum jelly or a thick barrier cream around your upper and lower lash lines, taking care not to get it on the lashes themselves. This “guard” helps prevent pigment from staining your eyelids. - Position Protective Pads
Place under-eye pads or cotton rounds under your lower lashes to catch any stray dye and protect your skin. This also helps you apply more precisely. - Mix the Tint
In your non-metal mixing dish, combine the correct amount of dye and developer. Use the ratio specified by the product instructions (manufacturers vary). As a manufacturer, we’ve found that a medium-thick, creamy consistency works best for control and minimal dripping. - Apply the Tint
Use the applicator (brush or spoolie) to pick up the mixture. Gently apply from the base of your lashes toward the tips. If you feel unsteady, apply in short strokes rather than trying to do it all in one go. For the upper lash line, apply from under the lashes (on the lid side), not from above, which helps reduce the risk of dye getting into your eyes. Many seasoned users recommend this approach. - Set the Timer
Once applied, let the tint sit for 5–10 minutes, depending on how deep you want the color. If it’s your first time, err on the shorter side. - Remove the Tint
Use a damp cotton pad or swab to gently wipe away excess dye, then rinse with lukewarm water. Be cautious, keep your eyes closed if possible. Any residual dye should be removed fully to avoid irritation. - After-Tint Cleansing
After rinsing, cleanse again with a gentle, water-based cleanser. Avoid anything oily for the first 24 hours, as oil-based products can degrade the tint and make it fade faster. - Dry and Inspections
Pat around the area dry with a soft towel. Inspect in a mirror. If you notice any leftover spots or uneven color, you can carefully do a small touch-up, but always follow safe handling practices.
Aftercare: Making Your Tint Last Longer
From years in manufacturing and working with salons, we’ve learned how important aftercare is to preserve both lash health and the richness of your tint. Here’s what we recommend:
- Avoid Water & Steam (First 24 Hours)
Give your lashes time to “set.” Water, steam, or sweat in the first day can diminish the depth of the tint. - Use Oil-Free Products Around the Eyes
Oil-based cleansers or makeup removers can break down the dye molecule or make it fade earlier. Stick to water-based or gentle micellar cleaners. - Be Gentle When Washing
Use soft touches, not harsh rubbing. Over time, physical stress can cause lash shedding, which reduces how long your tint appears fresh. - Consider Lash Serums / Conditioners
Using a lash serum (like one with peptides or castor oil) can keep lashes strong, healthy, and more receptive to future tints. Many of our B2B clients — spas and salons — pair tinting with their recommended lash-care serums for better longevity and customer satisfaction. - Plan Your Next Tint
Because lashes grow in cycles, repeat tinting every 4–6 weeks tends to work best for maintaining a consistent look without over-processing.
Common Mistakes & Troubleshooting (We’ve Seen It All)
As a manufacturer, we get feedback daily from wholesalers, salon professionals, and at-home users. Here are some common pitfalls, plus fixes:
- Too Much Developer / Wrong Ratio: This can cause irritation or over-lift the lashes. Always follow the manufacturer’s ratio instructions — mixing more developer doesn’t necessarily mean better results.
- Skipping the Patch Test: Users may think, “I’ve done this before,” but sensitivities change. Even we recommend a patch test every time you use a new batch.
- Sloppy Application: Dye getting on the skin can stain. Using a barrier and applying carefully (short strokes) helps.
- Leaving Tint On Too Long: Longer doesn’t always mean darker; it can cause irritation or even damage lash structure.
- Inadequate Rinsing: Residual dye can irritate eyes overnight. Make sure to rinse thoroughly.
- Using Oil Too Soon After Tint: This can cause color fading quickly; wait at least 24 hours.
Real Feedback from Wholesalers & End Customers (Why Our Tint Stands Out)
Because we manufacture eyelash tint for both bulk and retail, we receive real-world feedback from our clients — and this is where our expertise really shines through.
- Wholesaler Praise: One large distributor told us: “Your eyelash tint holds up better than other lines we’ve carried. Our salon customers say they get more consistent results per kit — less waste, fewer returns.”
- Salon Owner Feedback: A salon we supply said, “When we switched to your tint, client satisfaction jumped. Fewer clients complain about irritation or staining — and staff love how easy the mix is.”
- DIY Customer Reviews: From at-home users online: “I bought your pro-grade kit, and yeah, it felt more serious than a drugstore version — but my lashes turned out so much darker, and it lasted nearly a month.”
“I was scared to do at home, but the instructions were clear and the tint wasn’t super runny — my application went well, and my eyes stayed totally fine.”
These kinds of comments make us proud. They reflect that our manufacturing process — using safe raw materials, strict QC, and thoughtful packaging — is helping people get pro-level results at home.
Addressing Safety Concerns: Why At-Home Isn’t for Everyone
Let me be candid: while proper at-home eyelash tinting can be safe, it’s not risk-free. Regulatory bodies and consumer protection organizations caution strongly against casual use in certain cases.
- According to Trading Standards in the UK, the chemicals in lash lift and tint kits (like perming agents) can be quite strong. Without professional hygiene and knowing what you’re doing, there’s real risk of eye injury, allergic reactions, or infections.
- Some users on forums warn that improper application can lead to irritation or worse. > “I personally … tint my own lashes … takes practice … never looks as good as salon … but steady hand is key.”
Because of these valid concerns, we recommend that first-timers consider doing their initial tint under the guidance of a licensed esthetician — or at least having someone help them — before attempting solo.
Why Choose Us as Your Eyelash Tint Manufacturer
As a manufacturer deeply rooted in the eyelash tint industry, here’s why choosing our product gives you confidence:
- Professional-Grade Formulas
We formulate with salon-quality dyes + developers, offering a balance of safety and performance that many consumer kits can’t match. - Regulation-Compliant
Our tints comply with major regulatory standards (e.g., silver nitrate limits, viscosity ranges) for professional-use products. - Rigorous Quality Control
Each batch is tested for stability, pH, and pigment consistency — so users don’t end up with uneven results. - Support & Documentation
We supply detailed instructions, MSDS sheets, and best-practice guides. We also train our B2B clients (distributors and salons) on how to use and store products safely. - Scalable Supply
Whether you’re a wholesaler buying large volumes or an individual buying a DIY kit, we have packaging sizes and pricing to suit you. - Proven Satisfaction
With a wide base of salon and retail clients, our reputation is built on real feedback: clients consistently remark on safety, ease-of-use, and the rich, lasting color of the lashes.
Final Thoughts
Tinting your eyelashes at home can be a delightful way to boost your natural beauty — giving you darker, more defined lashes without the daily fuss of mascara. As a trusted eyelash tint manufacturer, we’ve poured our expertise into creating a tint product that’s safe, effective, and professional-grade.
But let me put on my “responsible manufacturer” hat: please don’t skip safety steps. Do your patch test, follow the instructions exactly, use clean tools, and rinse thoroughly. If you’re new, take it slow — perfection comes with practice.
If you’re ready to try a high-quality eyelash tint that balances power and peace of mind, feel free to reach out to us for samples, custom orders, or more technical guidance. We’re proud to support both salons and DIY beauty fans with world-class products.
Conclusion
Eyelash tinting at home can be safe, beautiful, and cost-effective — but only if you use a professional-quality dye, adhere to strict hygiene, and apply with care. As an experienced eyelash tint manufacturer, we offer expert-formulated kits built for performance and safety. When done correctly, you’ll enjoy rich, long-lasting color for weeks. Reach out to discuss custom orders, wholesale options, or a sample — let us help you elevate your lash game.