![]()
Achieving a flawless winged eyeliner look has never been easier, thanks to the innovative eyeliner stamp. If you’re wondering how to use eyeliner stamp for perfect results every time, you’ve come to the right place. This guide will walk you through each step, ensuring you get smooth, precise wings without the hassle.
Ready to elevate your eyeliner game? Get in touch with Heyme Meauty today for a personalized quote on our premium eyeliner stamps!
What is an Eyeliner Stamp?
An eyeliner stamp is a tool designed to simplify the process of creating a symmetrical, precise eyeliner look. It typically features a pre-shaped stamp on one end, often in the form of a wing or cat-eye, and is used to imprint the shape directly onto the eyelid.
The purpose is to offer an easy and fast way to achieve perfect eyeliner, even for beginners or those with unsteady hands. It eliminates the guesswork and skill needed for traditional eyeliner application.
The benefits of using an eyeliner stamp are significant. It saves time by providing a uniform shape with minimal effort, ensuring consistent results every time. Unlike traditional eyeliner, which can be difficult to apply evenly, the stamp guarantees precision, making it easier to create sharp, defined lines.
Choosing the Right Eyeliner Stamp
Eyeliner stamps come in various shapes and styles, each designed to create different looks. Common options include winged stamps for a bold cat-eye effect, as well as more subtle shapes for everyday wear. Some stamps feature a rounded edge for softer lines, while others are sharp for a more defined finish.
Choosing the right shape depends on the type of look you want to achieve, whether it’s dramatic or subtle. When selecting the best eyeliner stamp for your eye shape, consider the curvature and size of your eyes. For round eyes, a slightly elongated wing shape can help create an almond-eye effect.
For smaller eyes, go for a softer stamp that won’t overwhelm the eyelid. Additionally, those with hooded eyes might prefer stamps with a higher arch to avoid smudging or fading throughout the day. Key features to consider include the size and design of the stamp, as well as the ink quality.
A larger stamp is ideal for those who want bold lines, while a smaller stamp suits a more delicate look. Ensure the ink is long-lasting, smudge-proof, and waterproof to maintain a flawless look throughout the day. Look for stamps with ergonomic designs for easy handling, and always test for skin sensitivity if you have sensitive skin.
How to Use Eyeliner Stamp: Step by Step Guide
Ensure your eyes are clean and primed. Gently remove any makeup or oils using a makeup remover or cleanser. After your eyelids are clean, apply an eye primer to create a smooth surface. This helps the eyeliner last longer and prevents smudging. If you have oily eyelids, consider using an eyeshadow base or setting powder to keep everything in place.
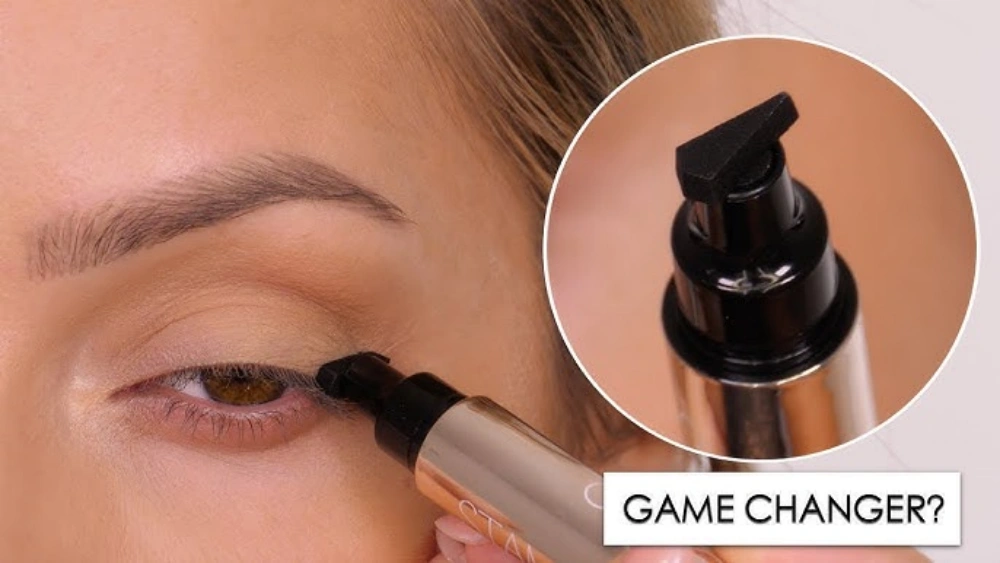
Step 1: Positioning the stamp
Position the eyeliner stamp correctly by aligning it with the outer corner of your eye. Hold the stamp in a way that feels comfortable and makes it easy to create your desired look. Make sure the stamp’s shape matches the direction you want the eyeliner to go, whether it’s a wing or a soft flick. Angle it carefully to suit your natural eye shape.
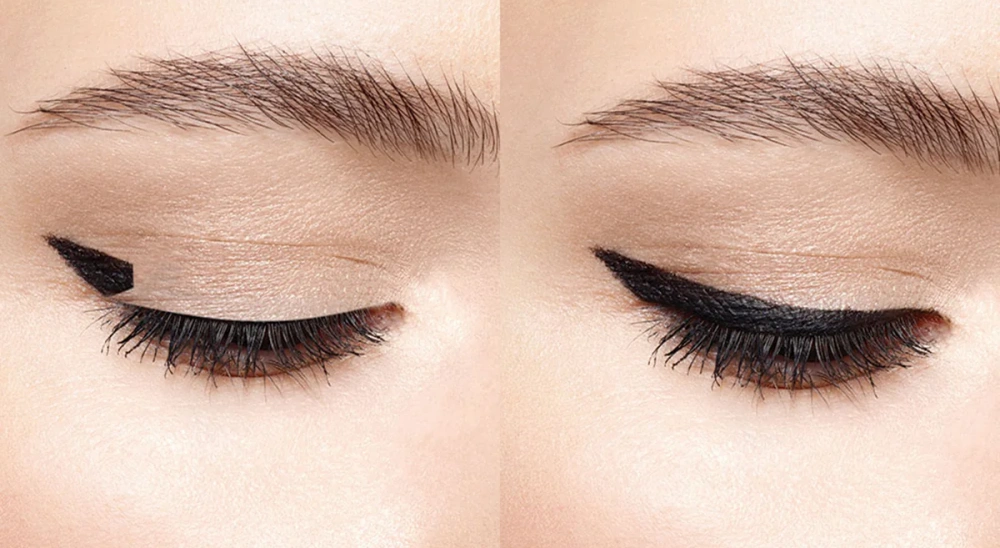
Step 2: Applying the stamp on the outer corner of the eye
Involves gently pressing the stamp onto the outer corner of your eye. Apply light pressure, ensuring the ink leaves a clean impression. The stamp should be placed just above the lash line, following the natural curve of your eye. Once you’ve positioned it, pull away carefully, revealing the shape of your eyeliner.
Step 3: Filling in the liner
Filling in the liner by gently drawing along your lash line with the stamp. Use short, light strokes to connect any gaps and create a smooth, continuous line. If you want a thicker line, simply build up the color by applying additional layers. You can extend the line to the inner corner if desired, or leave it as a bold winged look.
Step 4: Final touch-ups for symmetry and sharpness
Make final touch-ups to ensure both sides are symmetrical. Use a small brush or cotton swab to fix any uneven areas or sharp edges. If you want a sharper look, add a bit more liner to the wing and clean up the line with a makeup remover. Check both eyes to ensure the lines are even, crisp, and the look is perfectly defined.
Tips for Achieving the Perfect Wing
Adjusting Pressure for Different Eyeliner Thickness
Adjust the pressure for different eyeliner thickness, start by applying light pressure for a thin line. This ensures precision and control. If you desire a thicker line, gradually increase the pressure as you move along the lash line or when you reach the winged tip. Adjusting pressure allows you to create a bold, dramatic wing or a subtle, everyday look with ease.
Matching Both Eyes for Symmetry
Matching both eyes for symmetry can be tricky, but it’s essential for a balanced winged look. Start by stamping one eye, then replicate the position and angle on the other eye. Ensure both wings are at the same height and that the lines are even.
Use your natural eye shape as a guide, and remember, slight imperfections are normal. Take your time to perfect the symmetry, ensuring both wings match in length and tilt.
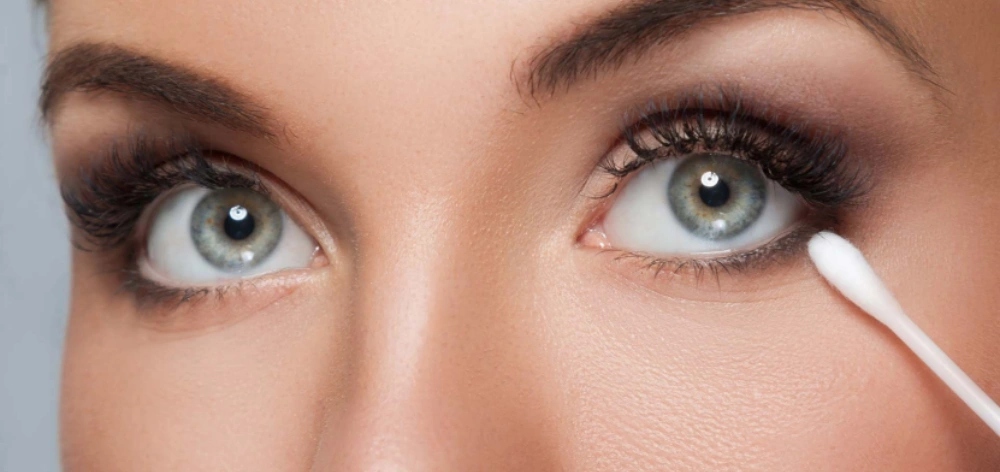
Clean Up Mistakes With a Cotton Swab
Dip a cotton swab into makeup remover or micellar water. Gently trace along any smudged or uneven areas to sharpen the line. Be gentle to avoid removing too much product. This simple step helps you tidy up your look, giving the wing a crisp, clean finish. It’s the perfect way to refine your eyeliner without starting from scratch.
Common Mistakes to Avoid
Over-Applying Product
Over-applying product can result in a heavy, uneven line that looks clumpy or smudged. When using an eyeliner stamp, it’s important to apply a light, controlled amount of product. Start with a small amount and gradually build up if you want a thicker line. This helps avoid the product from looking too bold or uneven, ensuring your eyeliner appears sleek and refined.
Not Considering Your Eye Shape
Not considering your eye shape is a common mistake when applying eyeliner. Different eye shapes require different techniques. For example, if you have smaller eyes, a subtle wing may work best. If you have almond-shaped eyes, you can go for a more dramatic wing.
When choosing your eyeliner stamp, take into account your natural eye shape to ensure the wing flatters your features and enhances your eye shape.
Using the Wrong Stamp Shape
Using the wrong stamp shape can lead to a less flattering eyeliner look. It’s important to choose a stamp that matches the shape of the wing you want to create. For example, a cat-eye stamp works best for sharp, angular wings, while a rounded wing shape is ideal for softer looks.
Selecting the wrong stamp shape can result in uneven or awkward lines that don’t complement your eye shape. Always select a stamp style that aligns with the look you’re aiming for.
How to Remover Your Eyeliner Stamp?
Step 1: Gather Your Tools
Get a cotton pad or a makeup remover wipe. Choose an oil-based makeup remover or micellar water for best results. Have a clean towel on hand to gently pat your skin dry afterward.
Step 2: Apply Makeup Remover
Dampen the cotton pad or wipe with your chosen makeup remover. Gently press the cotton pad over your eyeliner stamp for a few seconds to break down the product.
Step 3: Wipe Away the Eyeliner
Gently wipe the cotton pad in downward strokes along the eyeliner line. Be careful not to rub too hard to avoid irritation. The eyeliner should begin to lift away from the skin easily.
Step 4: Clean Up Any Residue
If any eyeliner residue remains, use a clean part of the cotton pad or a fresh wipe. Repeat the process until the area is completely clean.
Step 5: Finish with a Gentle Cleanser
Once the eyeliner is removed, wash your face with a gentle cleanser to ensure any remaining makeup remover is washed off. Pat your skin dry with a clean towel.
Step 6: Moisturize
Apply a gentle moisturizer to the eye area to keep your skin hydrated after makeup removal.
How to Store Your Eyeliner Properly?
Store your eyeliner stamp in a cool, dry place away from direct sunlight or heat sources. Excessive heat can cause the ink to dry out or degrade, impacting its performance. Always store the eyeliner stamp in an upright position with the tip facing downward. This helps maintain an even flow of ink to the stamp, ensuring smooth and consistent application every time.
How to Prolong the Life of Your Eyeliner Stamp?
To extend the life of your eyeliner stamp, keep the cap tightly closed after each use. This prevents air from drying out the ink. Avoid pressing the stamp too hard against your skin during application, as this can cause unnecessary wear on the tip.
If the ink begins to fade, try shaking the stamp gently or tapping it against a surface to redistribute the ink. Regular cleaning of the stamp with a soft cloth also helps maintain its quality.
Conclusion
Mastering how to use eyeliner stamp can elevate your makeup routine, providing a quick and flawless wing every time. By following the right steps, choosing the perfect stamp for your eye shape, and caring for your product, you can achieve beautiful, symmetrical eyeliner effortlessly.
Ready to try it out? Get your eyeliner stamp from BN Pack today and experience precision like never before!
FAQ
Are eyeliner stamps worth it?
Yes, eyeliner stamps are worth it for those who struggle with creating symmetrical wings or want a quicker application. They offer precision, ease of use, and save time, making them especially valuable for beginners or those who have a busy schedule. With various shapes available, eyeliner stamps allow you to achieve consistent results every time, making them a reliable option for many.
Do you curl or apply eyeliner first?
It’s best to curl your eyelashes first. Curling before applying eyeliner ensures that your lashes don’t interfere with your liner application, and the curl will hold longer. Once your lashes are curled, you can proceed with eyeliner application for a cleaner, smudge-free finish. This order helps prevent your eyeliner from smearing or losing its shape.
Should beginners use pencil or liquid eyeliner?
For beginners, pencil eyeliner is generally recommended because it is easier to control and offers a softer, more forgiving look. Liquid eyeliner requires a steadier hand and can be challenging to work with for those just starting out. As you gain more experience, you can experiment with liquid eyeliner for a sharper, more defined look, but pencil is a great starting point.
Should eyeliner be thick or thin?
Eyeliner thickness depends on your personal preference and the look you’re going for. A thin line works best for a more natural look and opens up the eyes, while a thicker line creates a bolder, dramatic effect. For beginners, starting with a thinner line and gradually building up can give you more control over the shape and thickness of your eyeliner.
Which eyeliner is most attractive?
The most attractive eyeliner depends on your eye shape and the desired effect. For everyday looks, a classic black liquid or gel eyeliner works well to define eyes. If you’re looking for something softer, a brown pencil eyeliner can be flattering for most skin tones. For bold, dramatic looks, winged eyeliner with liquid liner can enhance the eyes. The most attractive eyeliner is the one that complements your features and makes you feel confident.